Nicholas Fluhart

September 15, 2013

Loadstar Supplemental

Filed under: Project: Loadstar,Trucks & Equipment — Nicholas Fluhart @ 8:07 pm
Icy Loadstar

Icy Loadstar

Just when I thought I was about finished with this project, an unexpected issue has surfaced and needs attention. This one is rather serious, but this whole thing has to be a labor of love…it has to be.

After I finished the lighting, rebuilt the carburetor, and cleaned up the interior, I took it out for a good road test. The truck performed great, considering it’s age, wear, and tear, and the fact that the engine could use an overhaul. The brakes worked good, all the lights worked good, and the transmission and two speed rear end shifted properly. The engine even ran surprisingly strong. For the first time in probably 20 years the truck seemed road-worthy, at least to the extent of my plans for occasional, limited use.

However, about 10 miles into my country drive I noticed it had become hard to downshift for a curve. I pulled over into a friend’s driveway. The transmission began rattling loudly and I could barely keep it in gear. I shut it down and crawled under the truck for a look. It appeared that the seal on the PTO plunger had failed. This caused the transmission to loose about a quart of fluid. I wouldn’t have thought that loosing one quart would put the nail in the coffin of a manual gear box that holds 6 quarts, but that may be the case. Of course, with a transmission this old, it could have been on the brink and this may have been just enough to finish it off. Whatever the case, I filled it back up with fluid, and the rattling stopped…good news. Tried to drive it…bad news. Second gear is a grind, and it never recovered 3rd gear at all which makes the truck almost impossible to drive.  Even with the 2-speed rear, the jump from 2nd to 4rth is too difficult, especially when loaded. I limped it home.

So now it sets and will remain so until I have time to pull the transmission and open it up to see what’s going on. If there is no major hard parts damage, I can get an overhaul kit (synchronizers, bearings, seals) and rebuild it for about $150 and a ton of time. Alternatively, I can replace the transmission if I can find another one for a decent price. So we’ll see.

In the mean time, here are a couple shots of the truck at this point. I was saving the overall photog until I finished it completely, but who knows when that will be.

Right Side
Left Side
Loadstar Interior

September 8, 2013

Project Loadstar: Lights

Filed under: Project: Loadstar,Trucks & Equipment — Nicholas Fluhart @ 5:35 pm

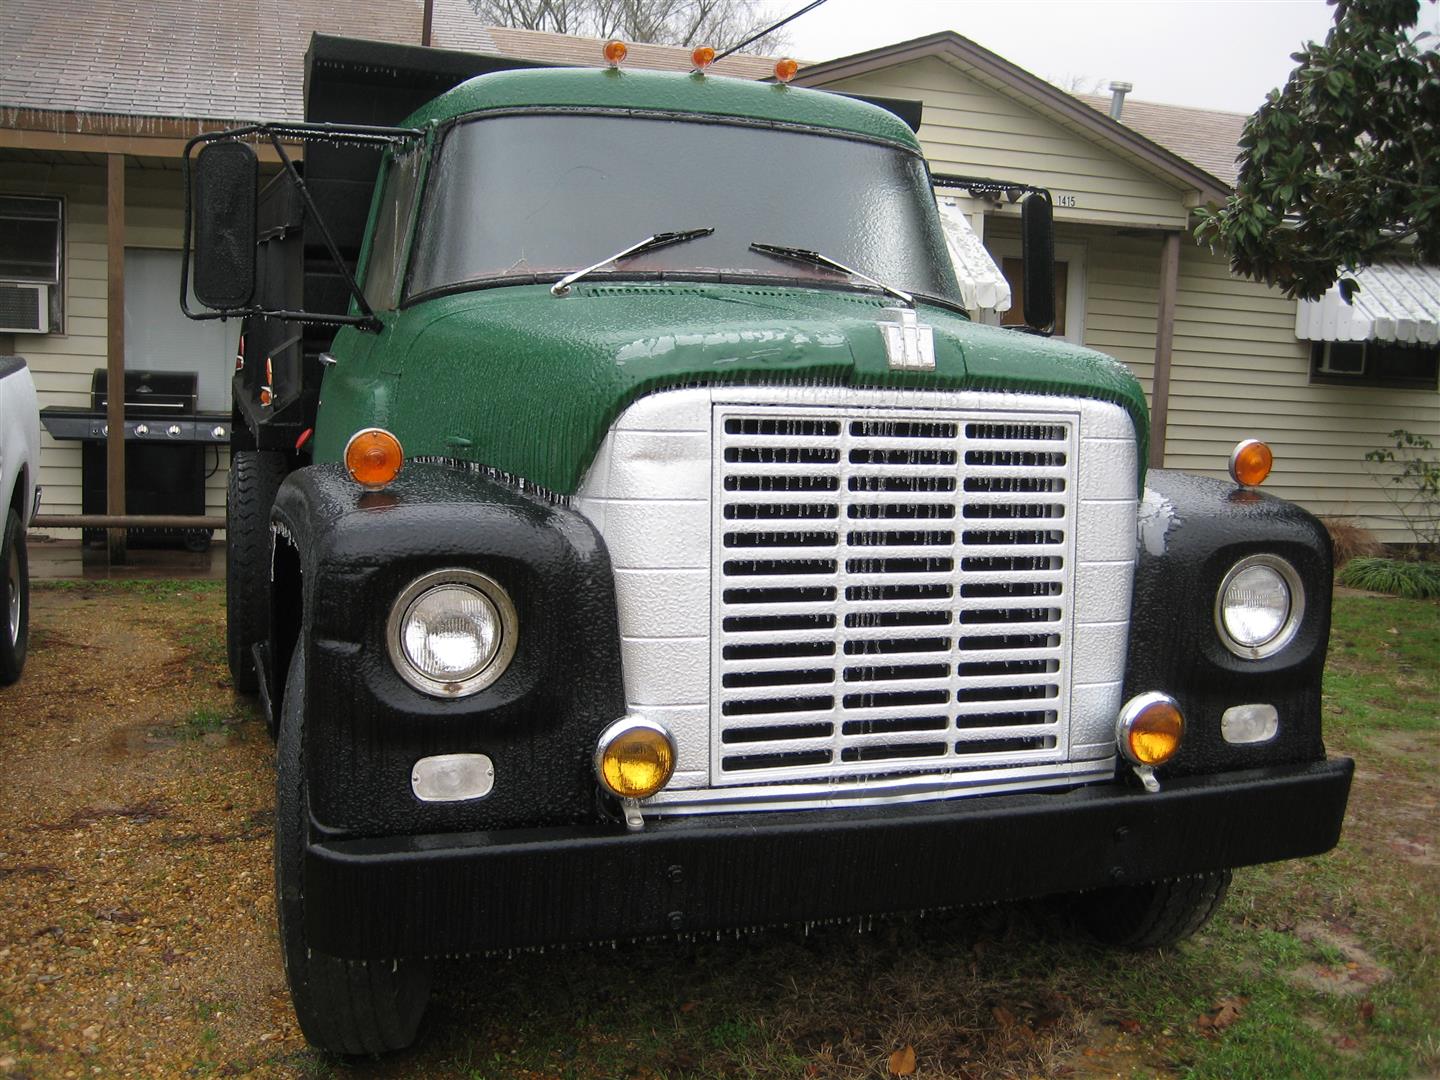
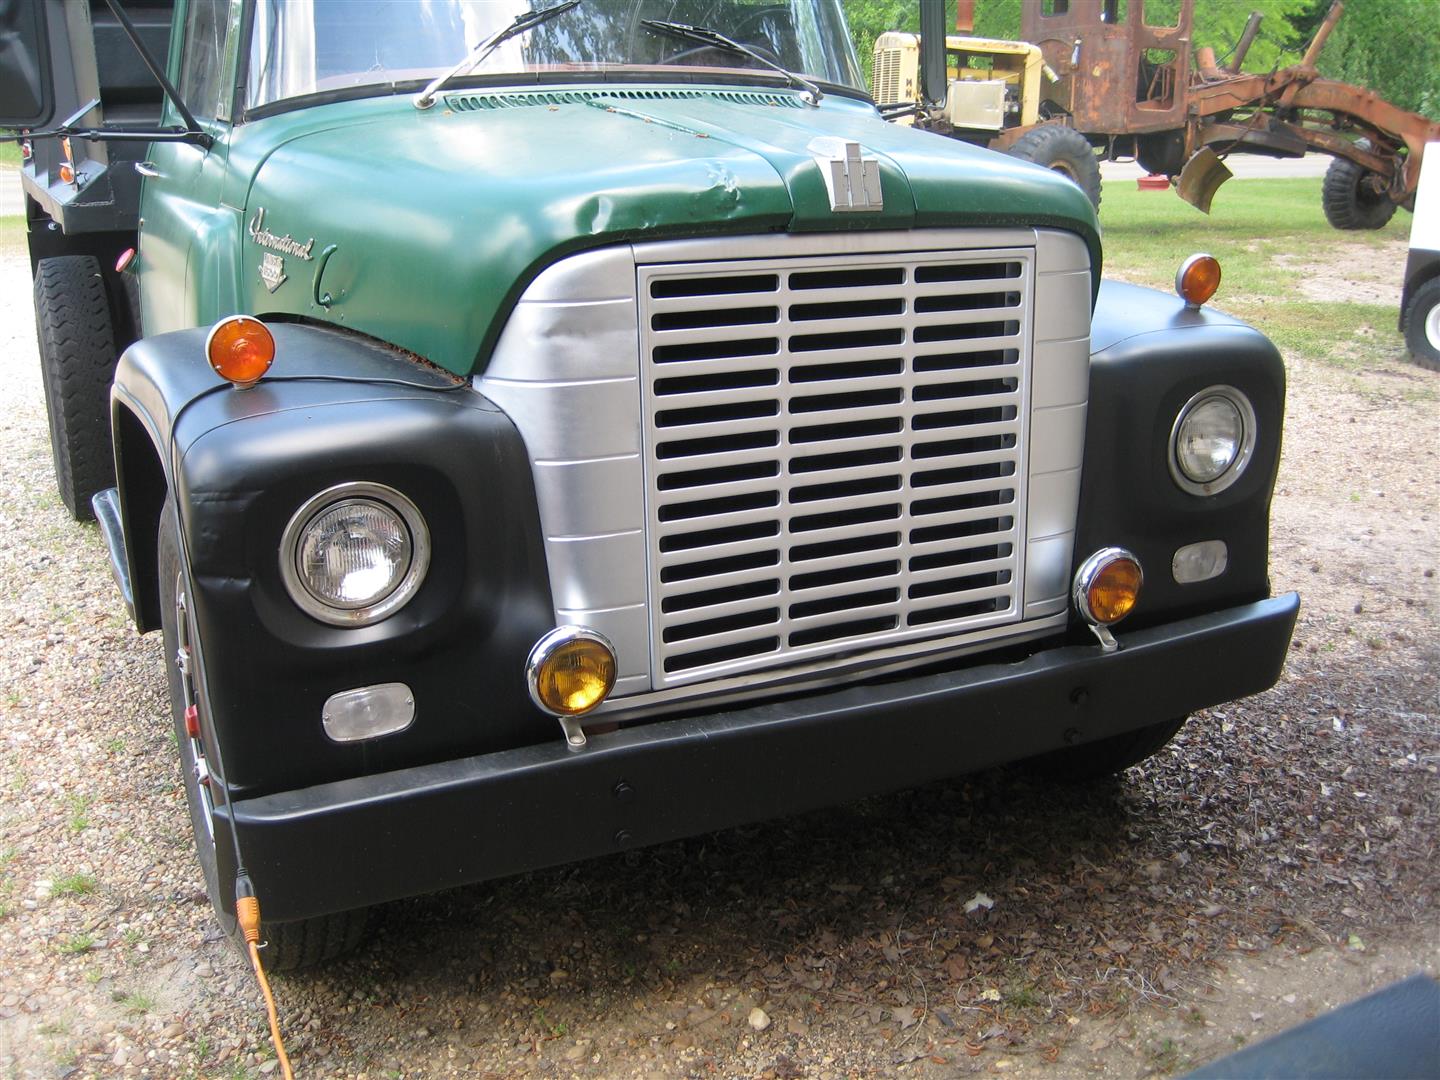
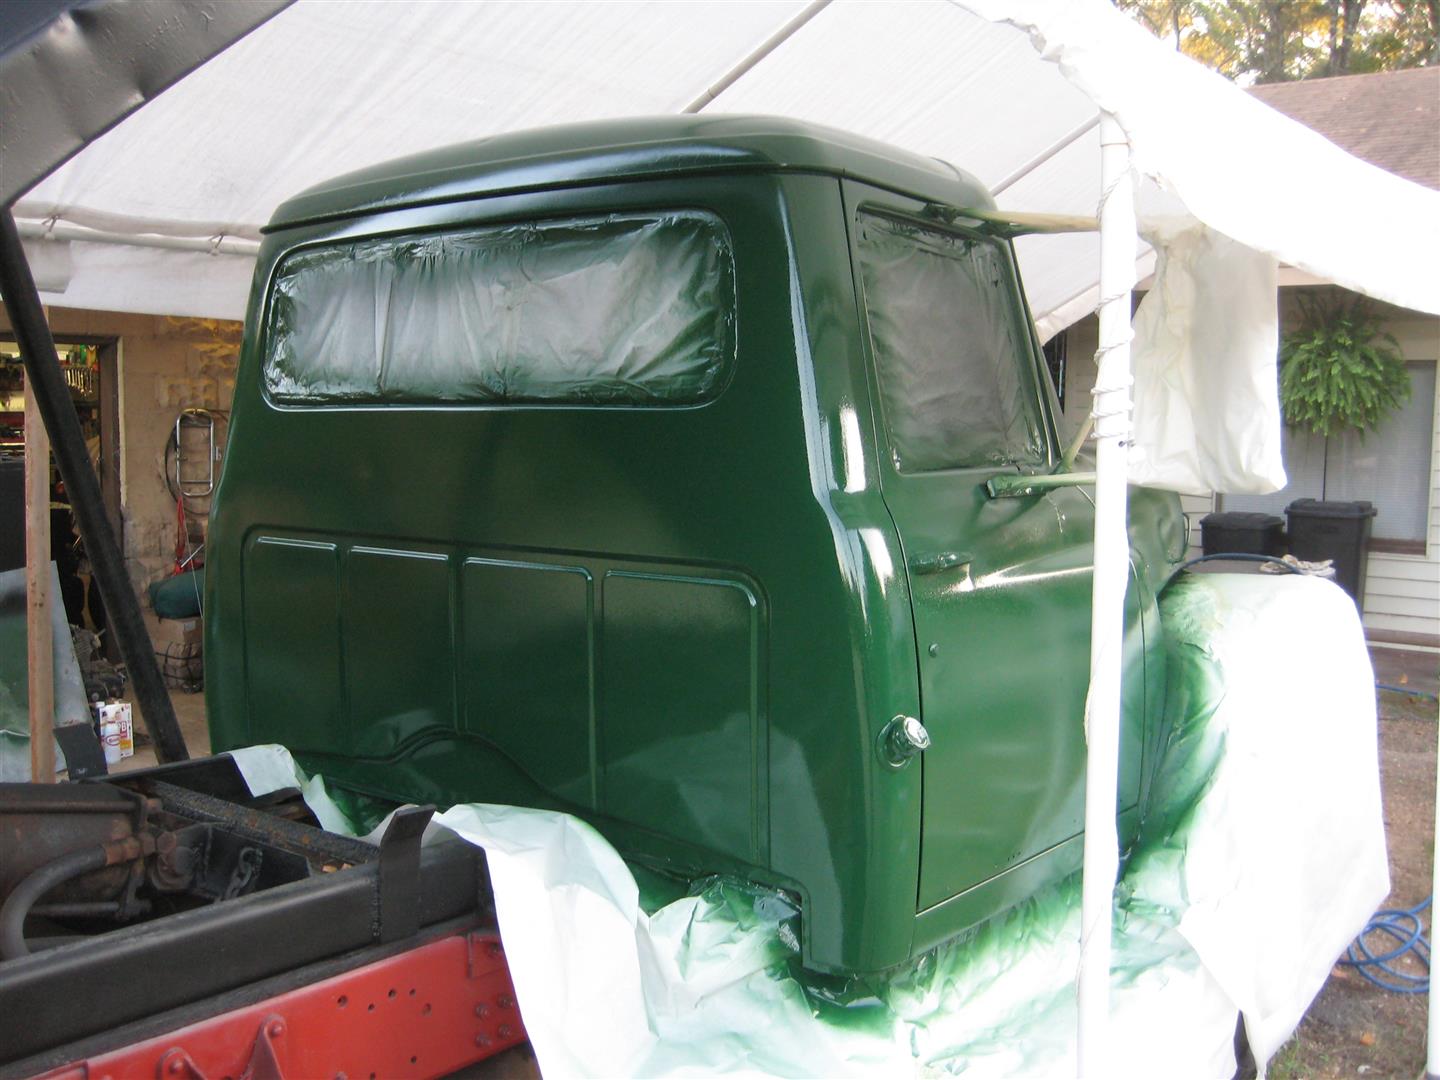
Now that the paint work is done, I’ll finish off the exterior with new lights. Lights are probably my favorite part of any project. While I’m not in to lights for bling purposes, I love finding period correct marker and signal lights as well as functional utility work lights. Often times I find myself working at night, whether it be to beat the heat in the summer or because I’ve run out of daylight in the winter. Whatever the case, I prefer to be prepared with functional lighting. This turned out to be a big part of the project because of the old, damaged wiring, bad relays, and blown fuses which are a result of years of neglect. Nevertheless, I traced down all the wiring problems, fixed them, and began the process of hanging the lights.

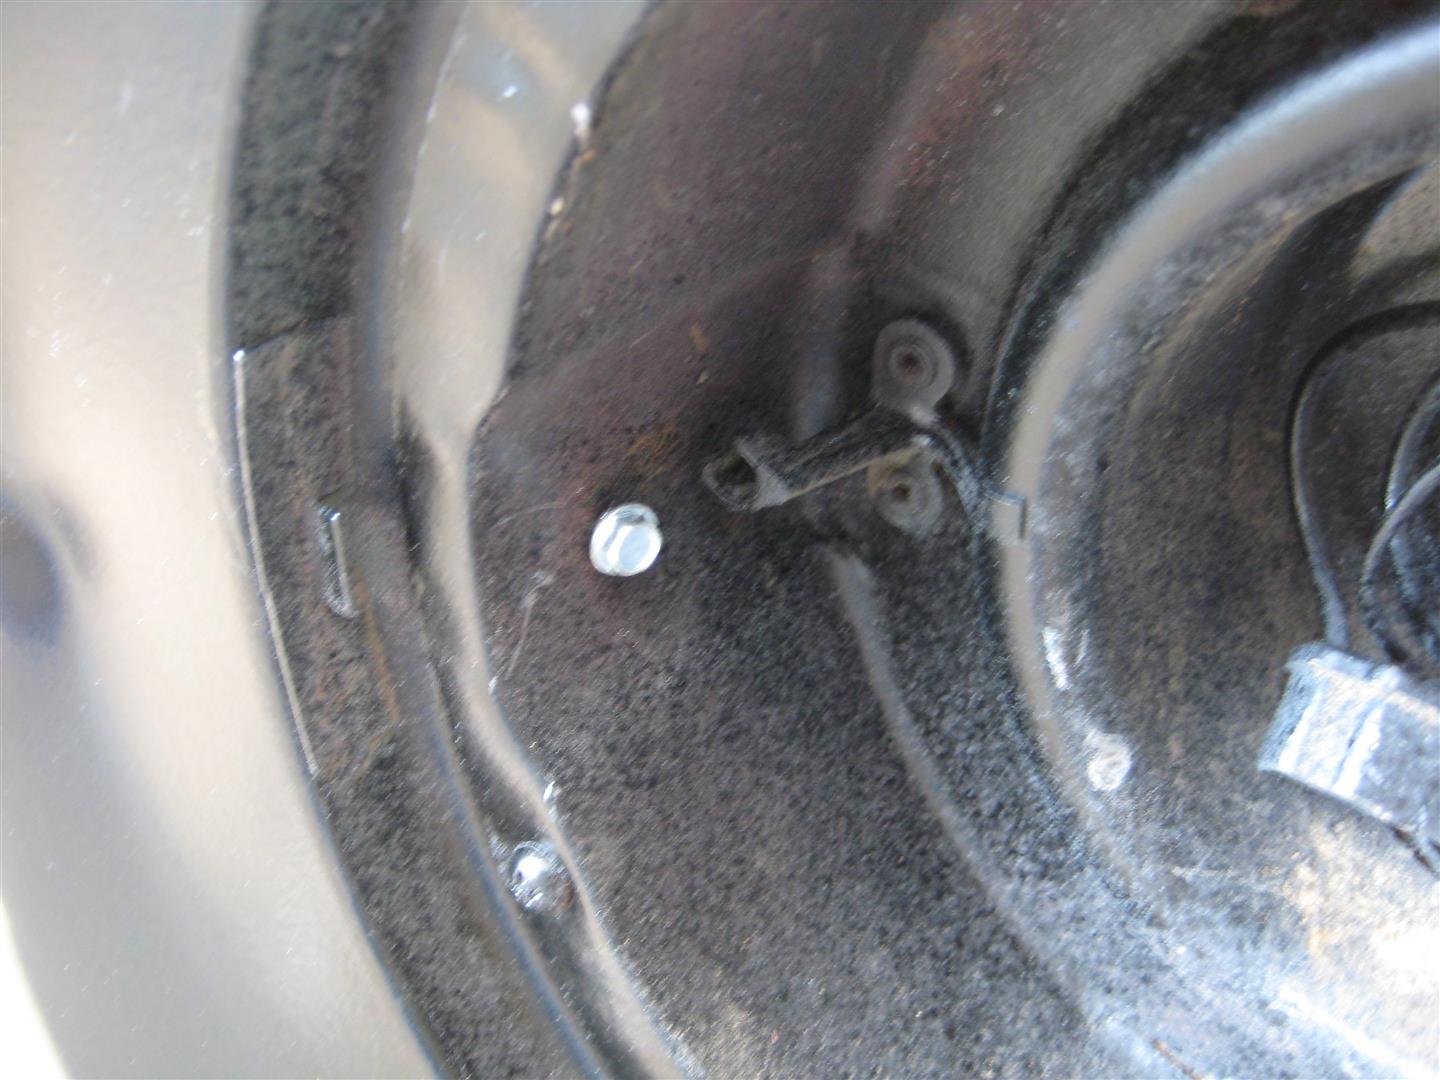
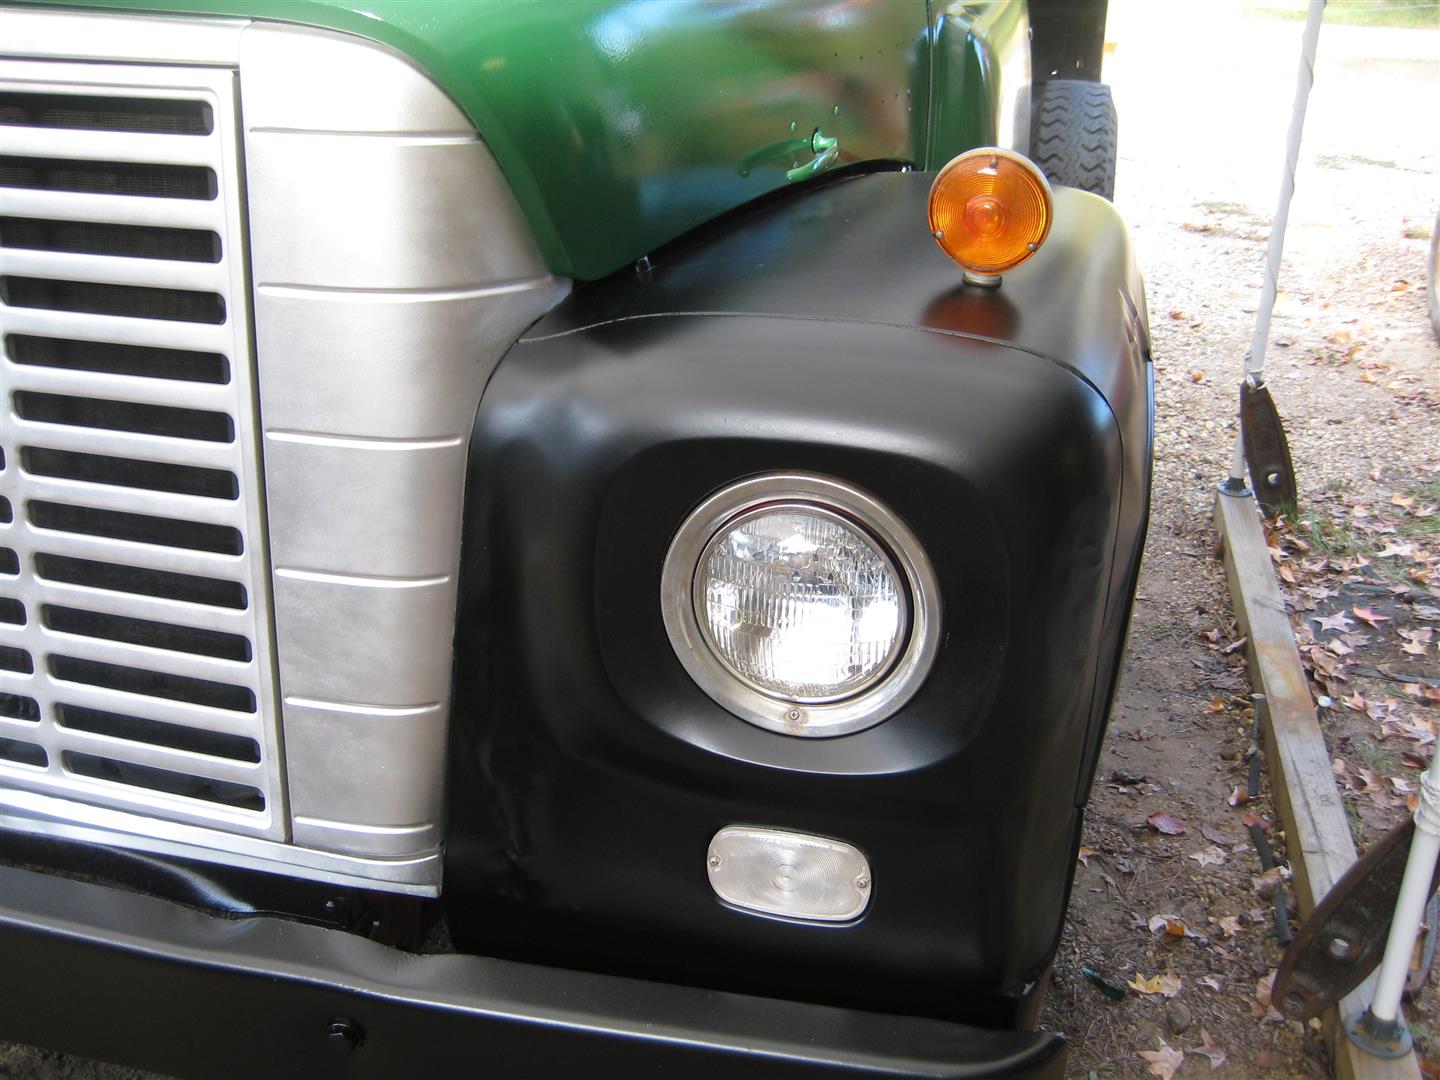
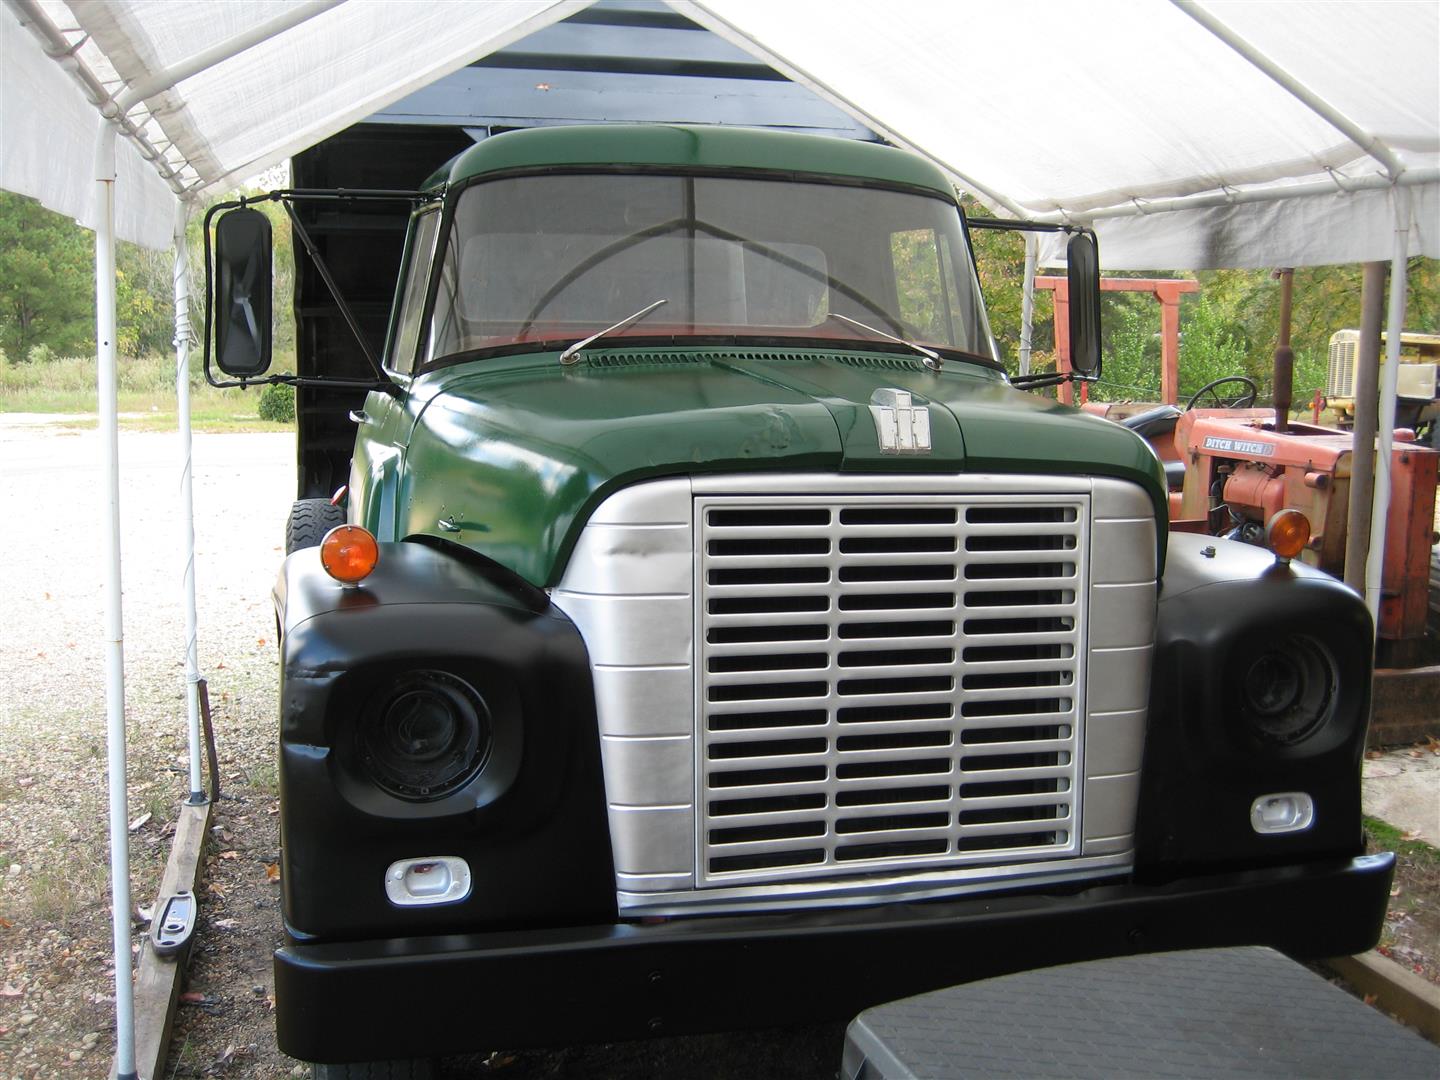
First I address the headlights. They are typical 12V sealed beam lights. The headlight switch only worked when it wanted to, so I replaced it with a used OEM IH unit I found on eBay. Next I had to replace one bulb which I found at the local parts store, and I noticed both bulbs were not adjusted properly. Once I pulled the chrome ring off of one light, I was able to see why. On one side of the housing there is a spring, and at the other side, as well as the top, there are plastic retainers that the adjustment/mounting screws attach to. In this case, the plastic retainers had long since become brittle and broken, so there was nothing to hold the light in straight. To solve this, I put a self tapping screw in the side opposite the tension spring. The shell around the bulb slid in and rested behind the head of the self tapping screw, and the spring tension from the opposite side holds the bulb in place. To adjust, I wedged pieces of rubber at the top and bottom of the headlight shell which wedges the light one way or the other and holds it in place.

Screw located opposite spring side.

Screw located opposite spring side.

Headlight Installed.

Headlight Installed.

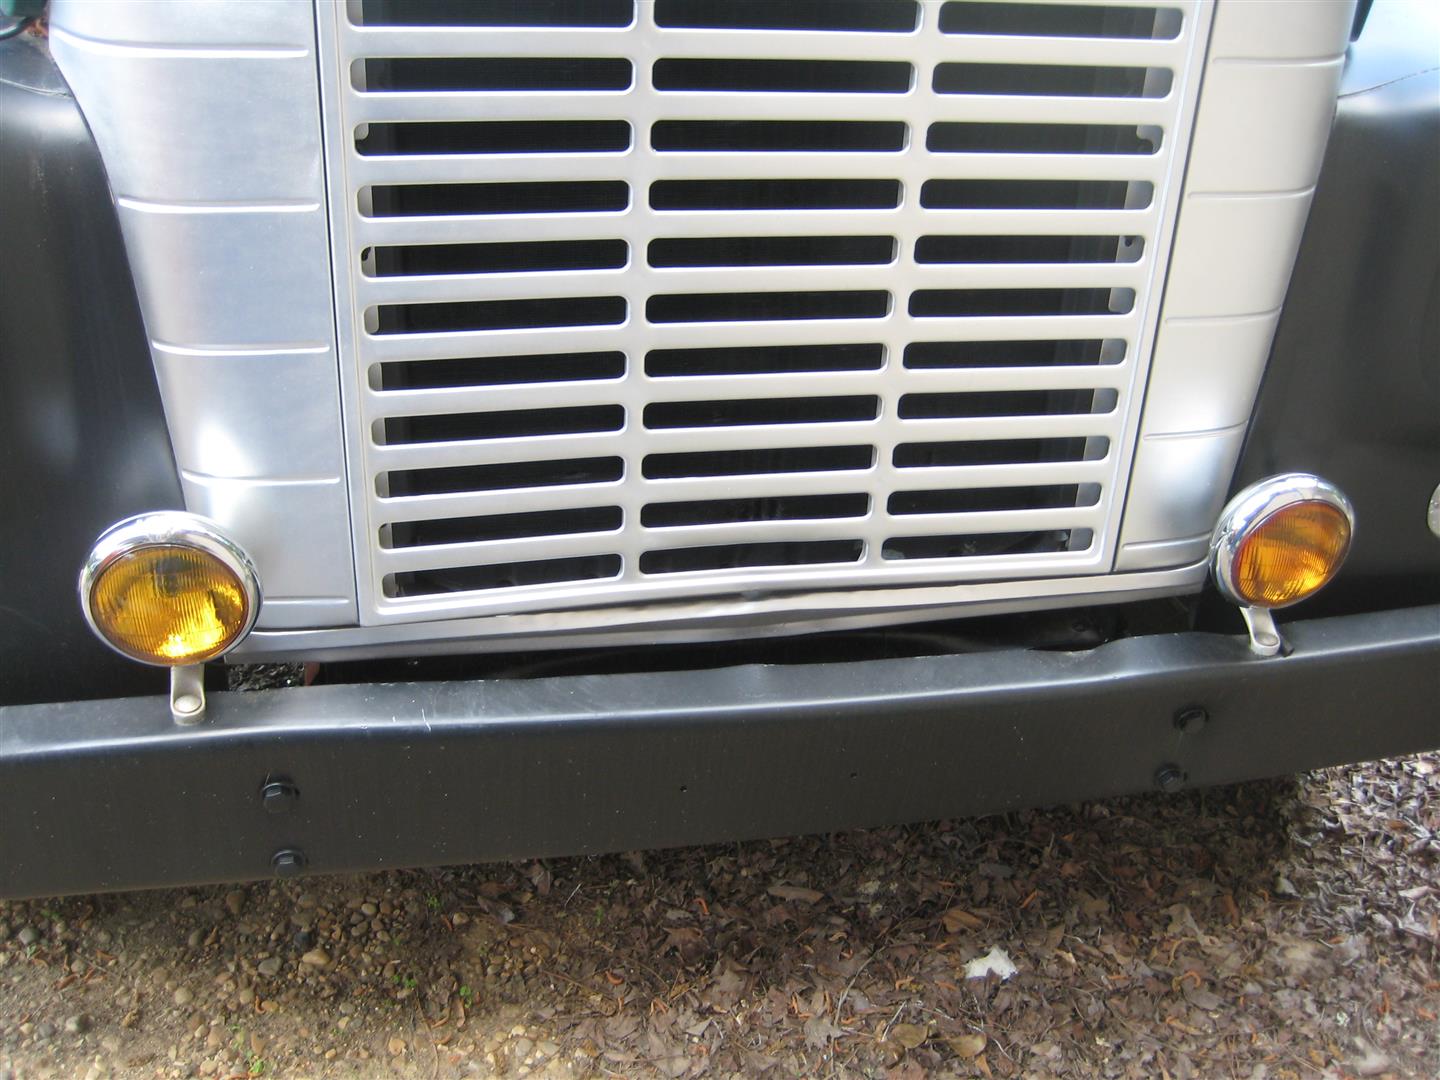
Next I address the parking light lenses and the turn signals on the front. The parking light lenses below the headlights (these are not turn signals as commonly thought) were destroyed from years of sun light. These were only on the first few years of Loadstar models; a Loadstar guru could tell you which years, but that I am not. The parking lights only come on when the light switch is pulled out to the first notch which turns on the front parking lights and the running lights all over the truck. The front parking lights go off when the headlights are turned on which is the second notch on the light switch.

These lenses have long since been discontinued by IH, so the best you can do is hope to find good used ones. This is no easy task as they are now very, very rare. However, after hours of online research and running part numbers, I hit a major score. I found a guy up in New York who had five new old stock lenses on his website. He has some kind of truck parts and salvage business. I don’t think he knew what he had because he listed them as GM lenses when they are in fact IH lenses. I called the place and immediately secured the purchase of all five lenses. I will use two of them on the truck, keep one for a spare, and sell the others on eBay where I should be able to recover my cost on all five.

For the turn signals on the front fenders, I found some vintage Signalstat round turn signals. These are period correct, but I don’t know if they were the original type on this truck; I’ve seen many early loadstars with square and rectangular signal lights. However, I think these look the best so I went with them. They are amber in the front and red on the back. They are single-wire lights that function as signals only, they are not running lights.

Turn signal, headlight, and parking light.

Turn signal, headlight, and parking light.

To really set off the front of this truck, I wanted some period correct driving lights or fog lights. As I looked through old photos of trucks from this era, I noticed that many of them ran amber colored Unity fog lights in chrome housings. These are very expensive, but after months of searching during this project, I found a set of new old stock Unity lights which were actually made for Navistar. I quickly bought the lights for half of retail and I put some amber bulbs in them and they look perfect!

Unity Fog Lights on Loadstar

Loadstar Front

Next I address one of my favorite parts of an old big truck, the cab clearance lights. Back in the days of this truck, there were primarily three available configurations for clearance lights. Two lights: one on each cab corner, most common on very early trucks. Three lights: three in the center of the roof, which is the configuration I have. Five lights: three in the center and one on each corner, or all five evenly spaced across the top.

For these, I found some new Signalstat units that are exact matches to the original IH clearance lights. Although these were used mainly on IH trucks, I’ve seen them on many different types of trucks, including fire engines. I thought about changing these up and going to a five light configuration, but upon deeper thought, I decided to leave it with just the three in the middle because later I plan to add unity spot lights to the roof at the corners.

Loadstar Cab Clearance Lights

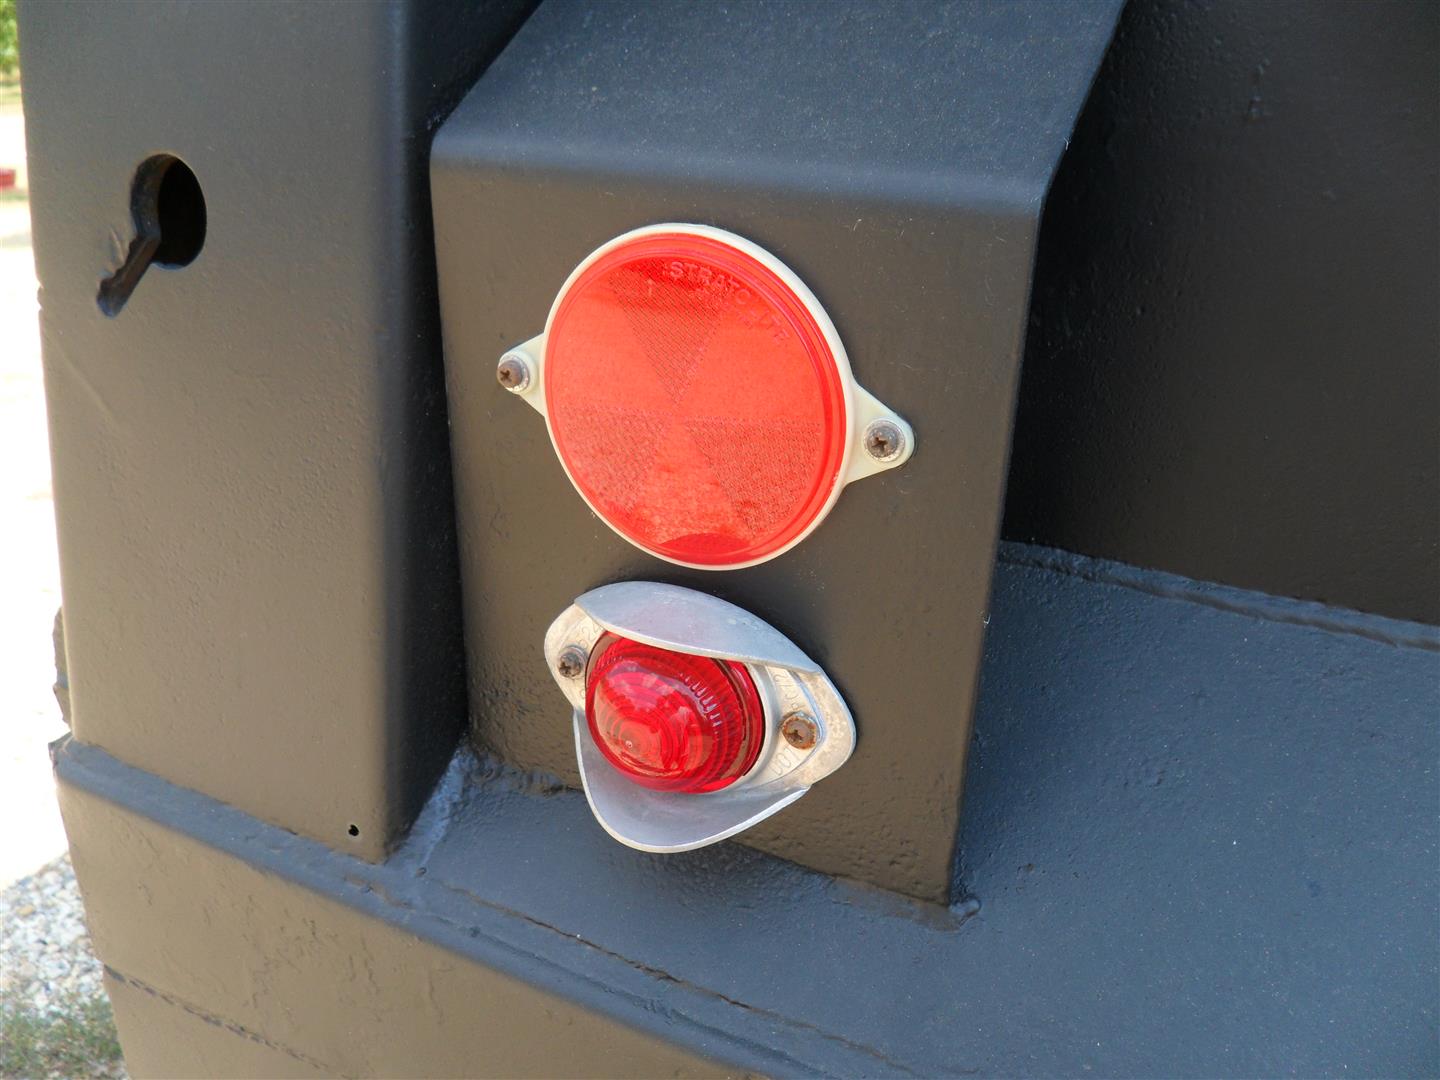
Now we have the side marker lights. For these I wanted to go back with the exact same light that came original on my Gar Wood dump bed because they look and function perfectly. They are armored marker lamps. As seen below, they have a built on rounded guard that protects the lens, which is great for a dump truck, and they are kind of like a bee hive style that looks vintage and really cool. Apparently, the patent on these passed through the hands of about three or four different manufacturers so I had to trace and cross reference part numbers, but much to my surprise, they are still made today. I found them through NAPA. I even went back with the original round reflectors. For the lights and reflectors, I used amber on the front of the bed and red at the rear, just as it came originally. Since the bed is so short, there is no need to put lights in the middle.

Front marker light (amber).

Front marker light (amber).

Rear marker light (red).

Rear marker light (red).

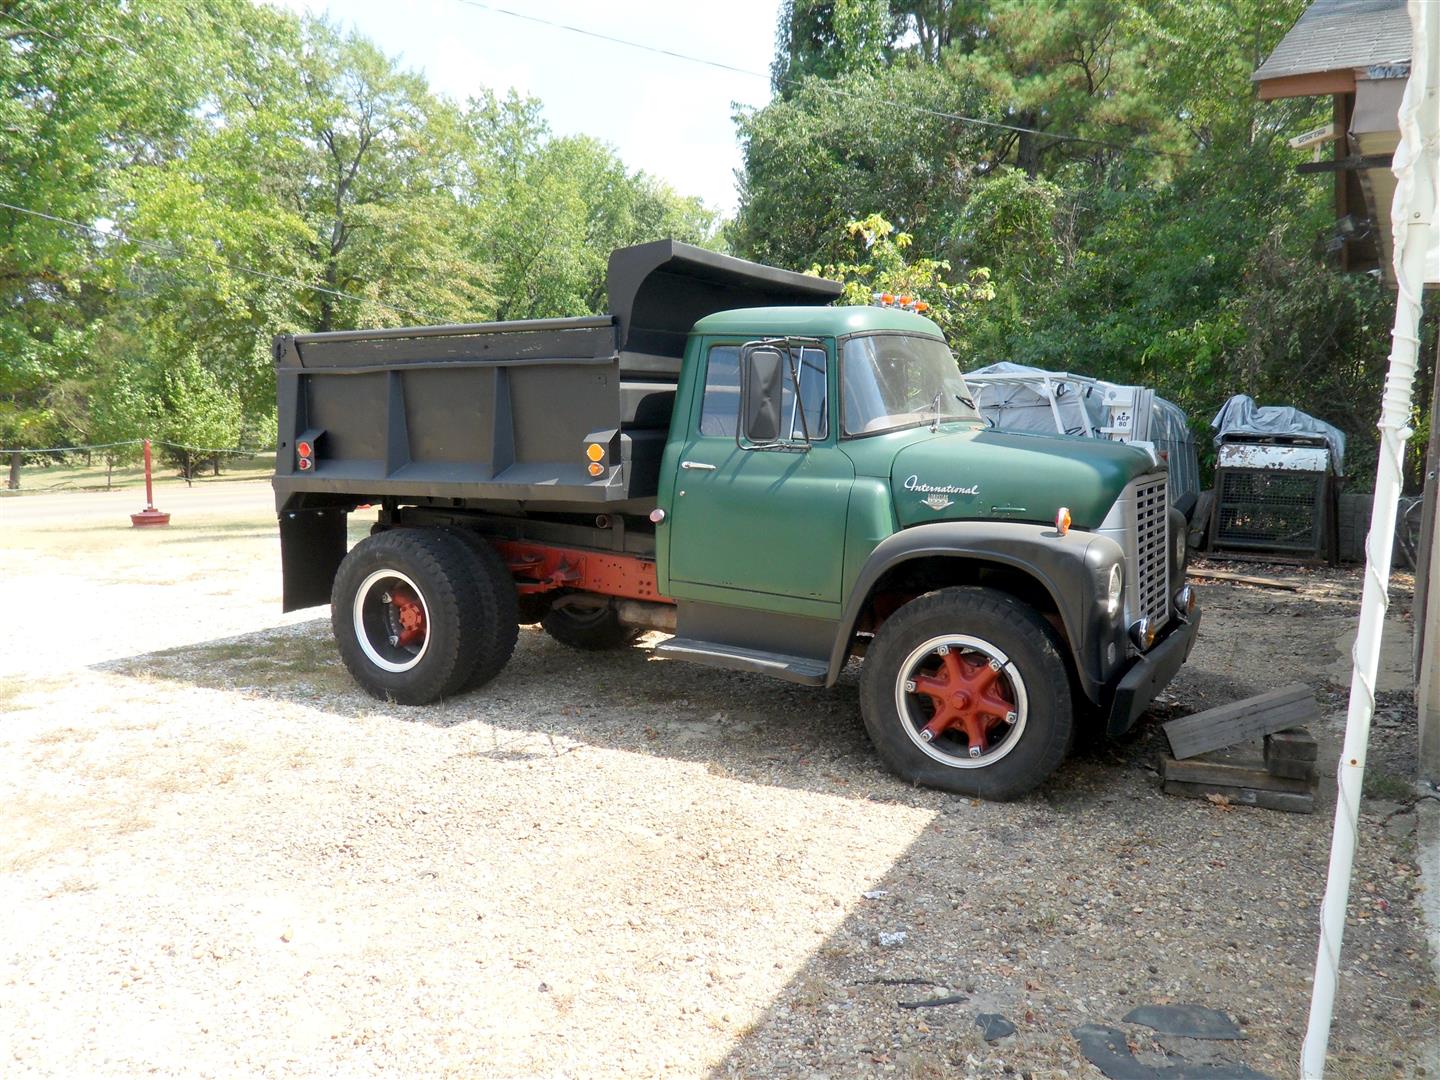
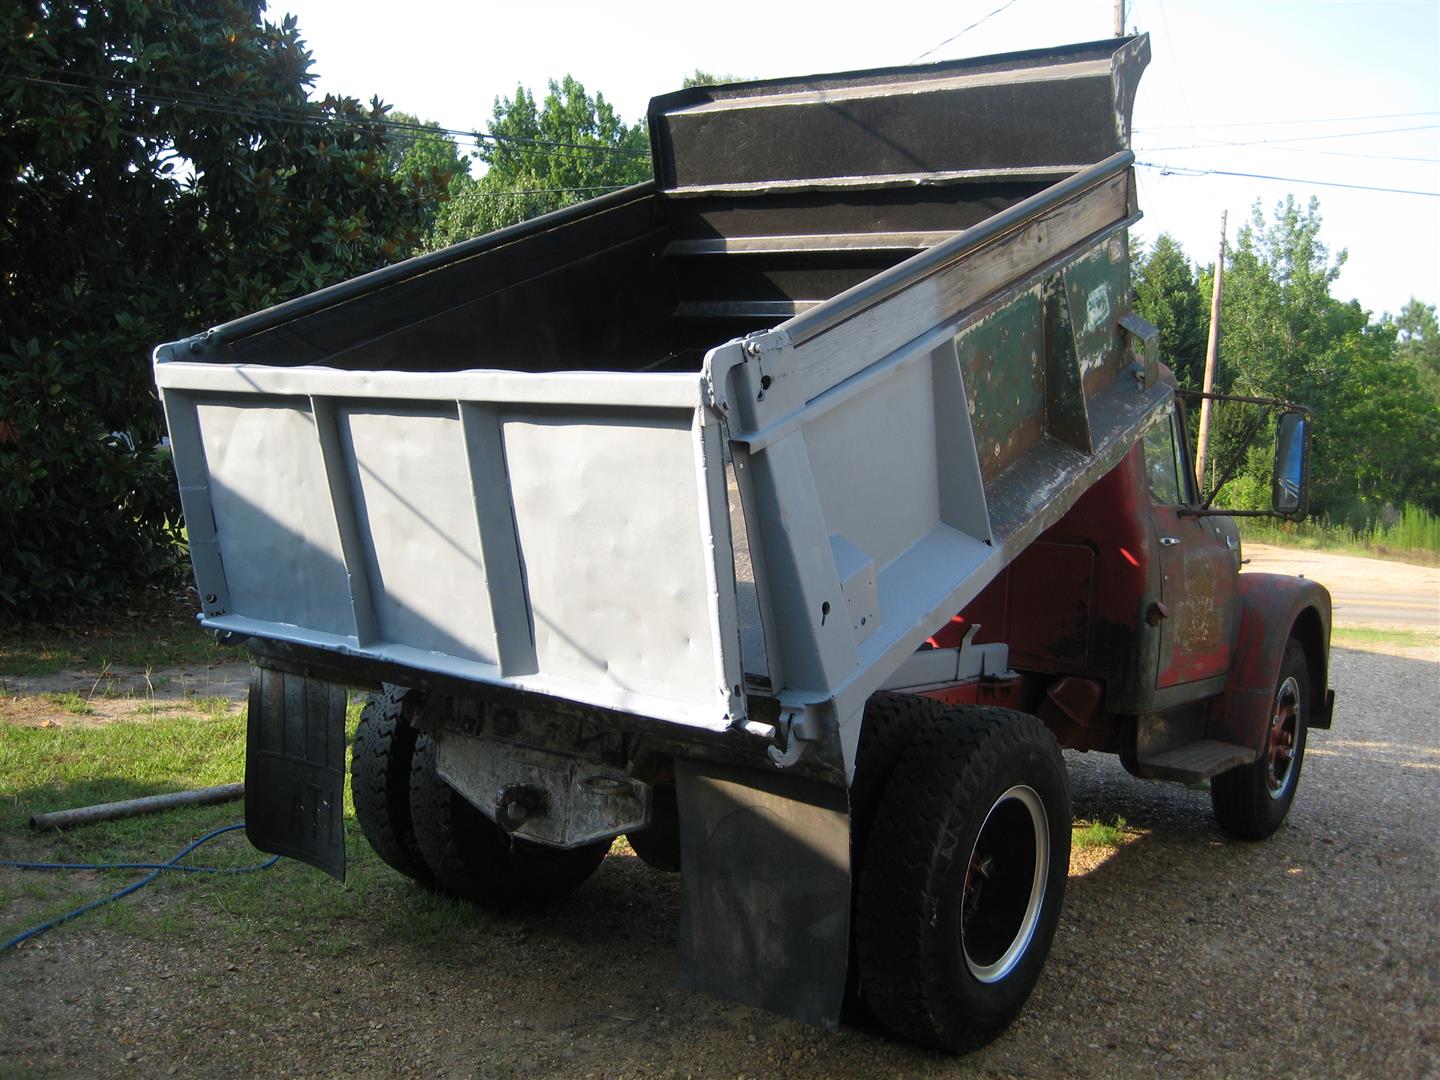
Last, I’ll address the tail lights. This was challenging because there is no good place to put lights on the back of this truck. There is nowhere to put them on the dump bed itself, so I have to look on the chassis. However, someone installed a heavy duty hitch plate on the end of the truck frame and mounted a pintle hitch. This lowers the height of the hitch and makes it easier to pull a trailer than having the hitch all the way up on the frame. The hitch plate mounts over the area where the original tail lights probably were, and the width of the plate is from one mud flap to the other leaving no room for tail lights. Someone cobbled together some lights on the outside of the frame behind the mud flaps and then cut slots out of the mud flaps so the lights could be seen. This looked ridiculous, but I had to do something along the same lines. I mounted some round Peterson lights to the side of the frame and neatly narrowed the mud flaps so the lights can easily be seen. It actually looks pretty good. I then installed some antique running lights under the tail/brake lights. Similar to the marker lights on the bed, they are a bee hive type light. The wire you see above the left turn signal is actually a ground wire I had to use to ground the bed to the frame in order to make the side marker lights work properly.

Tail Light Rear Lights

That’s pretty much it for the lights, at least until I mount the spot lights on the cab. Until next time…

June 16, 2013

Project Loadstar: Painting the Cab

Filed under: Project: Loadstar,Trucks & Equipment — Nicholas Fluhart @ 3:54 pm

Time to paint the cab. Like on the bed and chassis, and most all of my old equipment projects, I decided to go with an oil based industrial enamel. This type of paint works well on rough trucks and equipment as it tends to fill in scratches and it’s not quite as glossy as automotive paint. It’s less sensitive to oil that may be on the surfaces, and it’s quite easy to use. Add a catalyst/hardener when mixing, and the paint is very durable and fade resistant. It’s available in various grades of quality and price, and certain types do not require primer. Since it’s not worth fixing every little ding and scratch on this old truck, this paint works well for me.

The first thing I want to do is strip off as much of the old paint as possible. Previously I used a 6,000 psi pressure washer to remove much of the paint. The next step was to use a high speed wire wheel to remove as much as is feasible. Now these wire wheels are available in fine, medium, and coarse. On thick, rough metal, like that found on the bed, course is effective. For the cab, which has thinner sheet metal, we use fine and medium. This will remove the paint without gouging the metal and leaving unsightly scratches visible after the truck is painted.

Getting Started

Front Stripped

Back of Cab Stripped

When I removed as much of the old paint as I could and knocked out some of the bigger dents, I cleaned all the sheet metal surfaces with thinner and began the biggest job yet: masking the windows etc.

Masked, Front

Rear, Masked

Once the glass was masked up, I primed all the surfaces. After the primer had dried, I took a scotch pad and went over the whole cab by hand. This smoothed out the rough texture of the primer. Then I went back and cleaned all the surfaces with thinner and a clean rag. Then I mixed up satin black, like was used on the bed, and painted the front bumper, front fenders, step boards, and mirrors. While that dried, I took the grill in the shop and painted it an awesome looking silver, the same silver I used to outline the rims on the truck. When the black dried, yet another round of masking began. I masked everything that I had just painted black.

Black Masked, Front

Black Masked, Rear

Now for the green. The closest thing I could find to the original International green in industrial enamel was a hunter green in an Ace Hardware brand. It suits me fine.

Green Front

Green Rear

Now I pull the masking off, and we have a pretty good idea of what the finished truck will look like. Of course there is still more work to do, but it’s coming together quite nicely.

Front Painted

Rear Painted

Still yet to come, the lights, interior, and whatever else crops up. Until then…

June 9, 2013

Project Loadstar: Painting the Bed

Filed under: Project: Loadstar,Trucks & Equipment — Nicholas Fluhart @ 4:14 pm

The bed had been painted three or four times that I could see, and at least one of those times was done with a brush so it had a thick layer of flaking paint on the exterior. Earlier in the project phase I used a 6,000 psi pressure washer to remove most of the flaking paint, but there is much more paint and rust to be removed. Since I don’t have a large enough sand blaster, I’ll be removing it with high speed wire wheels. While this may not produce show quality results, it will work perfectly for my purposes. It’s a long brutal process, but I was able to grind the loose paint flakes and a lot of the surface rust off the bed and begin with the primer.

Bed Primer

Once a good coat of primer was applied, I used coarse fiberglass filler to fill in the various small rust holes before applying the last coat of primer.

Fiberglass Filler

When everything was dry, I mixed up a batch of satin black industrial enamel with a bit of thinner and catalyst/hardener. I purposefully did not use full gloss because it would show every little dent and ding that the bed was riddled with. The satin finish would not necessarily conceal much, but it would look better than a gloss finish. I gave it at least two good coats of the satin black.

Exterior Black

Bed Satin Black

Well she’s certainly coming along. In fact, I couldn’t resist installing my period-correct marker lights on the bed, as well as a new set of mud flaps. It almost looks like a vintage rat rod dump truck…

Loadstar Rat Rod Look 1

Loadstar Rat Rod Look 2

I think at this point, we’re on the downhill side of things and the project will be winding up soon. Next we’ll address the cab and I’m sure a few other things will come up. Until then…

June 2, 2013

Project Loadstar: Dump Bed Repairs

Filed under: Project: Loadstar,Trucks & Equipment — Nicholas Fluhart @ 4:23 pm

Metal that is in constant contact with dirt and moisture tends to rust. Dump beds are no exception. They are constantly handling various types of dirt which embeds itself in the many joints and cavities within the construction of the hoist body. The dirt absorbs moisture and holds it directly on the metal which then rusts. Rain water also collects in the bed if not kept at an angle when parked. This, along with left over dirt material in the bed, generally causes the floor to rust out first.

My Loadstar is on its second floor, which isn’t too bad for a 1966 model. However, had it been cared for properly it would be in much better shape. The original floor is made of plate steel. Typically, once it wears out most people would install new plate steel either by first cutting out the old floor and welding in the new material or by laying the new plate on top of the old plate and welding it in. In this case, when the plate floor wore out, rather than installing costly new plate, the previous owners used very old oil field tank metal. When I say “old” I mean it is from the era before welded tanks. This is a type of metal that is thinner than plate and is rolled into the shape of a cylinder and bolted or riveted together at the joint.

They took this metal from an old tank and attempted to flatten it out and use it in place of plate steel. They couldn’t quite get it flat enough, so the floor isn’t totally flat. Since it was already so thin, it didn’t last too long either. Now I don’t fault them for using materials on hand to reduce costs; I do that all the time. However, they made no attempt to clean, maintain, or service the bed, or any other part of the truck for that matter. Compounding things, when they took the truck out of service they left a few inches of sand and debris in the bed for several years. So by the time I cleaned out all the crud, it looked as you see in the photo below.

Inside Rusted
The most proper thing to do would be to cut out the bad parts, sand blast the rest to bare metal, then paint, etc. I don’t have the resources to do that on this project, so we’ll be taking a slightly different approach. First I use a knotted wire brush on my angle grinder to strip away as much dirt and rust as I can. Then, once I was covered from head to toe in rusty dust, I washed the bed with a water hose before using compressed air to blow out as much of the left over dust as possible. Once dry, I began sealing the inside of the bed with very thick coats of industrial enamel applied with a brush and roller.

Painting Inside Bed
Inside Bed Painted
Since I didn’t have the means to completely remove all the rust, my intention was to seal as much of it as I could. While this wouldn’t be acceptable for a show-quality job, it will work just fine for my purposes. Next I focus on structural repairs. Most of the rust holes are focused at the front and the joint where the floor meets the sides. The middle portion of the floor, albeit thin, is still functional. I decided to run 1/4 inch thick 4 inch angle across the front and down the sides. This will improve the structural integrity of the bed and cover the big holes. My friend Philip hooked me up with some long pieces of 1/4 inch plate 8 inches wide. He had it bent into 4 inch angle iron. I sealed the bottom of each piece before installation.

Angle Iron
Once painted, I backed the truck up into the shop to begin the repairs.

Backed In
I use my Clark forklift to hold up the tailgate so I’ve got easy access to the bed, then I retrieve my oxy-acetylene rig to cut the pieces to the correct length and of course my antique Westinghouse welding machine to install the pieces.

Ready for Repairs
My welding machine is in questionable condition, but it’s all I have. I made it work pretty well in this case as the repairs turned out OK. I did however encounter a challenge fitting the straight pieces of angle iron into the base joints of the inside of the bed. The floor was not perfectly flat as previously discussed, and also the sides of the bed had bulged out a bit from the thousands of heavy loads it has hauled. To remedy this, I cut the angle iron into shorter pieces, butted them together and welded them in. Then to fill in any gaps, I welded in filler metal. For filler metal, I took several long 5/8 bolts that I had in the scrap pile. I cut the heads off the bolts, essentially making them into studs, and laid them in the gaps and welded them in. I used industrial sealer to fill in any remaining gaps to hopefully dissuade dirt from packing itself into the cracks and holding moisture.

Angle Installed
Once everything was installed, I went over the new metal with a thick coat of industrial enamel. For my purposes, the inside of my GarWood dump bed is ready to use! But before that can happen, we have other areas of the truck to address. Until next time…

Next Page »

Blog at WordPress.com.