Nicholas Fluhart

January 8, 2015

Project: Bayou 300 4×4, Clutch Repair

Filed under: Project: Bayou 300 — Nicholas Fluhart @ 11:39 am
Tags:

So after riding the Bayou 300 4×4 a few times, a problem with the centrifugal clutch began to be evident. These clutches are very expensive to replace, and often when buying a used one online, you receive one that is just as worn out as the one you are trying to replace. So…I’ve come up with a solution (I’m sure other people were doing it long before I discovered it) for extending the life of a worn centrifugal clutch.

First, there are a few things you need to know. There are two clutches: the main clutch, also called a primary clutch, which engages the engine to the transmission, and the centrifugal clutch, also called a secondary clutch, which operates the main clutch by engaging it when the engine reaches a certain RPM. This is how the engine can idle while in gear and operate at low RPMs without stalling.

The centrifugal clutch is mounted to the engine crankshaft and uses a series of spring-loaded shoes. When engine RPM reaches a certain point, centrifugal force overpowers the springs, the shoes move outward, and they contact and lock to a drum which is geared to the main clutch. When the centrifugal clutch shoes are worn, the clutch generally slips at low RPM at the point of contact with the drum.

The main clutch is mounted to the transmission input shaft and uses a series of spring-loaded friction discs and steel plates. When the springs are engaged, the plates lock together and allow the transfer of power from the crankshaft of the engine to the input shaft of the transmission. When the components become worn the clutch will slip, usually in high gear or under heavy acceleration.

Both clutches are “wet clutches” meaning that they run in engine oil. The oil keeps them cool and helps them last longer. The friction materials in these clutches displace the oil when engaged and allow the clutches to “grab” and work properly. When worn, the parts do not displace enough oil and they slip. Specifically concerning the centrifugal clutch, there are grooves cut into the shoe linings so that oil can dissipate when the shoes make contact with the smooth surface of the drum. Over time, grooves begin to form in the smooth drum surface and the grooves in the shoe lining become shallow as the lining material wears; both conditions lead to less oil displacement which causes slippage.

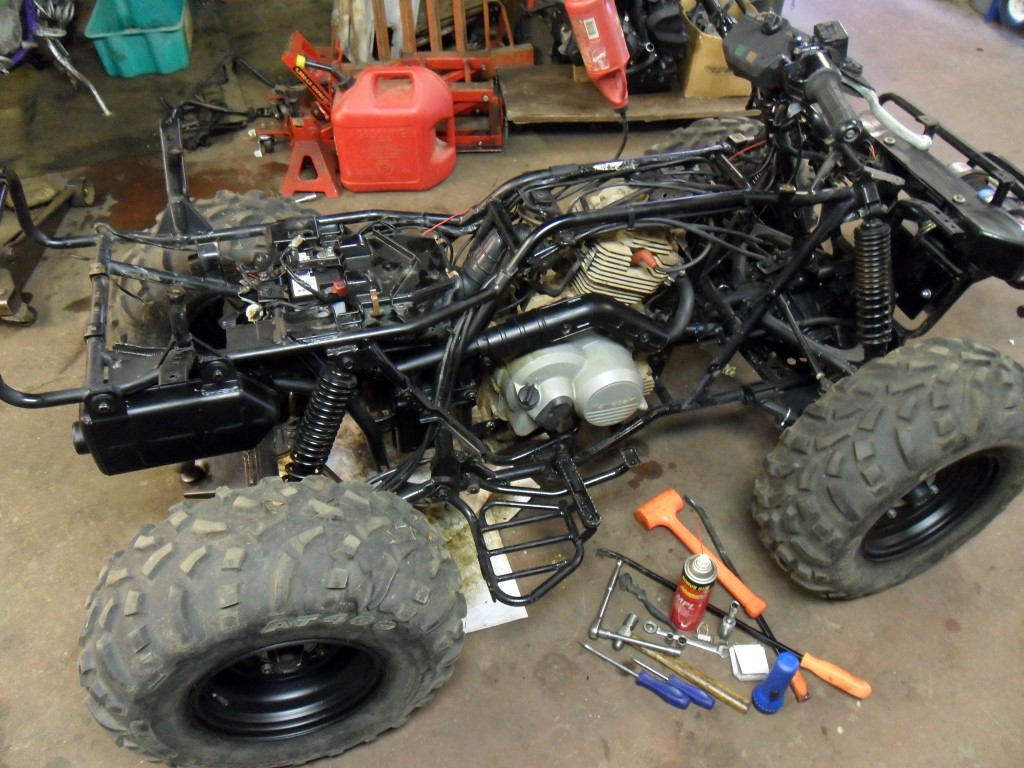
With the symptoms my ATV has, I’m pretty sure my problem is the centrifugal clutch…well, that and the fact that Bayou 300’s are well known for eating centrifugal clutches. So the work begins. I start by removing the right heel guard and foot peg so I can remove the clutch case cover as seen below.

Bayou 300 Clutches
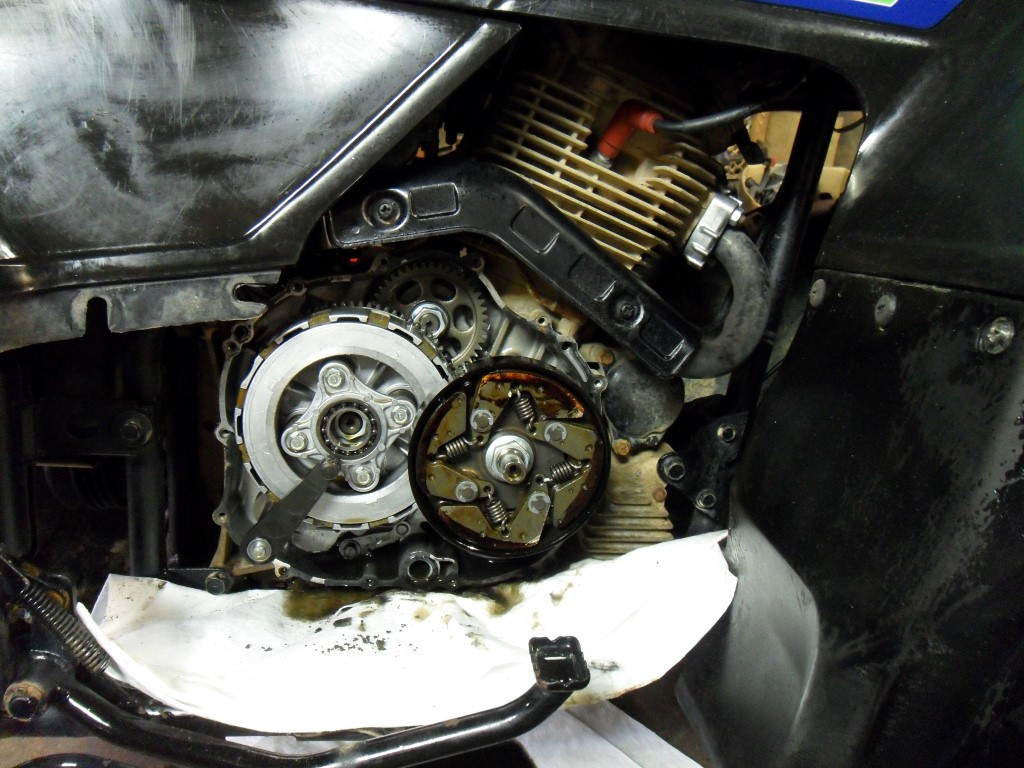
In the photo above, the main clutch is the one on the left and the centrifugal clutch is the one on the right. To remove the centrifugal clutch, remove the center nut, turn both clutch assemblies until the indentation on the main clutch basket lines up so that the drive gear on the back of the centrifugal clutch drum will clear, and it should slide off. If it doesn’t slide off easily, sometimes a little persuasion from a rubber mallet helps.

Once removed, I start with the shoes. I use a Dremel tool with a small, high speed cutting wheel and I simply trace the original grooves in the shoe linings. I do not recommend cutting all the way to metal. The idea is to make what is left of the existing grooves a little deeper, giving the oil a good path of escape. If you do not have a Dremel, this can also be done with a small hack saw blade.

Regrooving Clutch Shoes

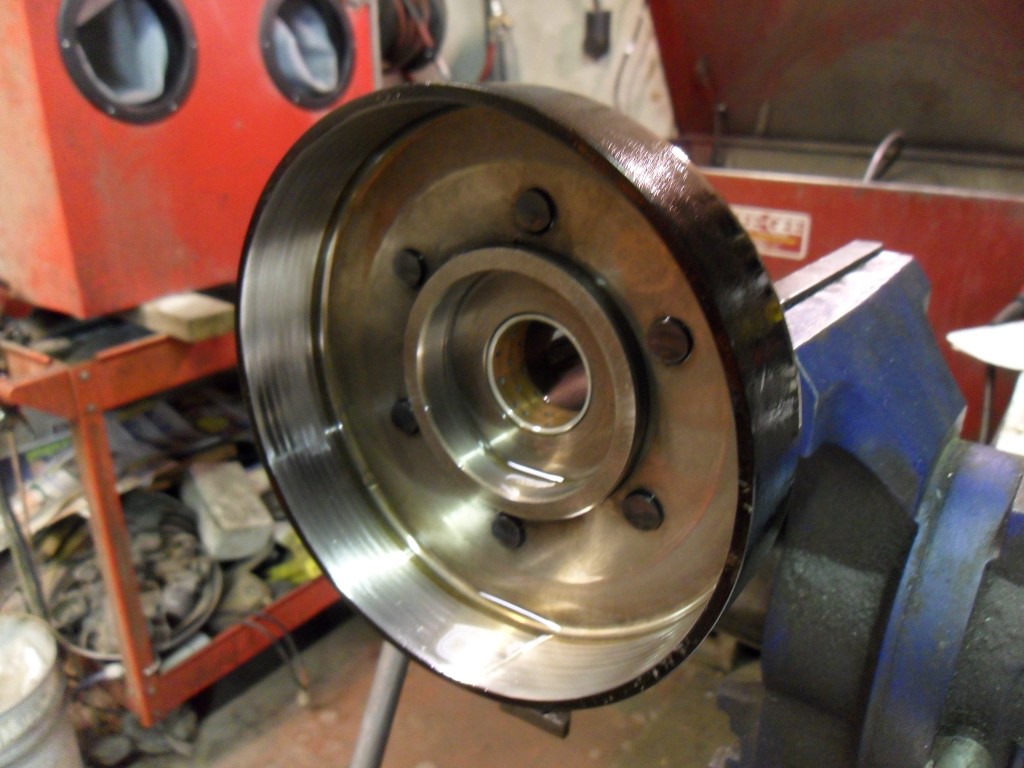
Next, I address the drum. Place the clutch drum in a fixture such as a vise and inspect the contact surface. If the drum is worn, there are usually groves in this surface. To correct this, I use a high speed abrasive wheel like the one shown below…in fact, I actually used this exact one. These can be found at a welding supply store and work great in an electric drill or pneumatic tool.

Abrasive Wheel
With the drum in the vise, I chuck the abrasive wheel in a drill and go to work smoothing out the grooves. Sorry, I don’t have a “before and after” shot, but I do have the pic below which shows the drum after. You can still see where the grooves were, but they are much less deep. I didn’t take it any further because I didn’t want to risk going too far and rendering the drum useless.

Bayou 300 Clutch Drum
The final step is one that most people either don’t know about or don’t do for some reason, but it’s actually the most effective. Once the drum surface is smooth, I use the Dremel tool with the same cutting wheel mentioned above, and I cut diagonal grooves in the drum surface. Determine the direction of travel when the clutch is in use and cut the grooves from the inside of the surface diagonally toward the outside. Don’t cut all the way through, just cut them about as deep as the grooves in the shoes.

Cutting Clutch Drum

As the shoes engage the drum, these diagonal grooves give the oil an easy exit path.

Grooves Cut In Clutch Drum
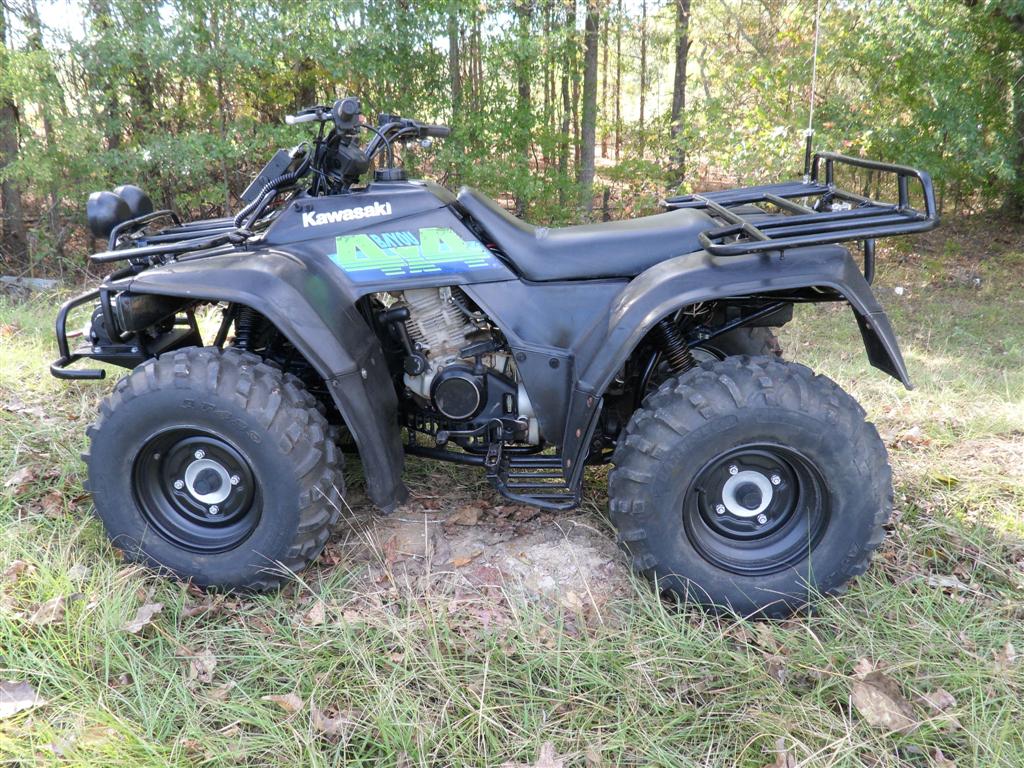
Some people may be leery of cutting their drum, but what’s the alternative? Buy a new one? If the clutch is already junk, what have you got to loose? Whatever the case, it works great. So at this point you are ready to reassembled the ATV in the same manor it came apart. Once I had it back together, I took it out for a good test drive. The clutch has never worked so good…at least since I’ve owned it.

June 9, 2014

Project: Bayou 300 4×4

Filed under: Project: Bayou 300 — Nicholas Fluhart @ 10:54 pm

These days, I rarely have time for a ground up ATV project, but that’s what this turned into. I bought this Kawasaki Bayou 300 4×4 a few years ago. Like the Moto-4 project, I had initially planned to part it out, but after closer inspection, and seeing the decline in the parts market for Bayou 300 parts, I determined that this one may be good enough to fix and keep it as a whole unit. Besides, it’s always nice to have a spare four wheeler around. I could use it if I needed it, or I could sell it. Not as in-depth of a blog post as the Moto-4, but moderately informative nonetheless.

Overall, the quad looked pretty sound, but the one thing I knew about it was that it didn’t fire. From my experience, the Bayou 300’s are notorious for eating CDI units, so I guesstimated that was the problem. I rolled it behind the shop intending to get it running within a couple of months or so.

Four years later: Well, I finally found time to address the Bayou 300. I found it out back in the bushes as you see it below.

Bayou 300 (Before)
So I rolled it up into the shop to pick up where I left off: the CDI. I’ll note that one thing that made this project feasible was the amount of parts that I had in stock for these quads. I parted out over 15 Bayou 300 4×4’s around the time period of owning this one. So when I ran across a part in my inventory that I thought I might need for this ATV, I set it aside. One such part was a CDI unit.

So once I changed out the CDI, the firing problem was solved; it had a good, blue spark. After that, it was just a matter of cleaning the carburetor and putting some new fuel in it and it started right up. The good news is it runs, the bad news is the cam chain is sloppy and it smokes. Fortunately, I have another engine for parts, and I have a new set of piston rings on the shelf. I replaced the cam chain parts, reworked the cylinder head, honed the cylinder, and installed new piston rings.

While I had it down this far, I decided to go ahead and inspect/service the chassis. I removed the plastics and began on the front end.

Getting Started Front Axle Removed

I noticed the front differential axle seals were leaking. If oil is leaking out, then water can leak in, so I replaced the front axle seals. While doing that, I noticed the front drive shaft u-joints had slack (a common problem on these, due to the joints being so small and light-duty) so I replaced them. Next, I noticed the front brake calipers were frozen, so I replaced them with a couple of used ones I had on the shelf.

While on the front end, I decided to address the potential for mounting a winch.  I located an aftermarket winch bumper at a local ATV shop. It will be an easy winch mounting solution, after all, a utility ATV is not fit for use without some type of recovery instrument. I also had recently bought a Bayou 300 parts quad with a fairly new set of Carlisle AT 489 tires, so after I painted the front part of the chassis and the front hubs, I painted the rims and installed the replacement wheels and the winch bumper.

Front With Tires Front With Bumper

I had a Warn 2000 lb winch on the shelf from a previous part-out. It worked great but needed a new cable. While cable shopping, I saw a synthetic winch rope that advertised twice the strength of steel cable, so I decided to give it a shot. The advantages of the rope is that it is light-weight, easy on your hands, it floats on water, is highly visible, and is supposedly exponentially stronger than steel cable. The down side is that it can be cut easily which is why it comes with a three foot lead of rope-protecting housing at the end of the rope (hook end) so the rope will not be cut when winching from around a tree, etc. I bolted the winch to a universal mounting plate with provisions for a fairlead, then to the bumper. It’s important to note when using a synthetic winch rope, it is generally recommended to use a hawse style fairlead. That’s the smooth metal one shown below, as opposed to a roller fairlead commonly used with steel winch cable.

Bayou 300 Winch
The last thing I addressed before leaving the front end was a set of CV boot guards. I found an old set of Oxlite boot guards under a tree by the junk pile behind the shop. They were removed from a Bayou 300 4×4 some months previous and were apparently discarded because they were in need of paint. I grabbed my angle grinder with the cup brush, cleaned the rust off of them, and gave them a shot of paint. With some new u-bolts purchased at home depot, they were ready for installation as seen below. Now, as a side note I must say that on this particular model these make it next to impossible to service the front differential oil. However, I’d rather have to use a series of universal joints and extensions to reach the fill cap on the differential than to constantly have to change axle boots. So…

Front End
On to the rear end. The two things I initially set out to address on the rear was the brake, which on the 4×4 model is located on the right hand side, and the axle bearing and seal on the left hand side. I noticed the left seal was leaking, and generally if the seal is leaking it is because someone ran the hub loose allowing it to move and waller out the seal. Then once the seal fails, it allows dirt into the bearing, and within one ride, the result is bearing slack. So, as I began to dismantle the rear, I notice a significant amount of greasy mud in the axle housing. Once again, the project snowball continues to roll. I decide it best to dismantle the entire rear end for cleaning and inspection.

Rear Dismantle

My inspection of the rear actually brings some pretty good news. Despite the mud, it all looked pretty good. The axle splines were in good shape, the differential was good and tight, and last but most certainly not least, the rear drive shaft was actually in good shape (which is rarely the case on any Bayou ATV). So after lots of cleaning, blasting, polishing, and a little paint, I laid out all the parts and threw it all back together.

Rear Cleaned Rear Assembled

So now it’s time to stab the engine and install the exhaust, carburetor, intake, etc. This all went pretty smooth. I was then able to grab my makeshift iv bottle and a hot battery and see if this thing was going to run.

Test Fire

Of course it did, so now we can bolt this thing up, get the fenders on, and start on the accessories. For fenders, it had a pretty good set to start with. However, someone had gone wild with an automotive paint gun and clear coated them. This of course is never a good idea because the fenders flex, the clear coat bubbles and flakes off, and you are left with a dull set of fenders with sanding scratches all over them. I had another black set from a previous tear down, and while the graphics were decidedly less flashy, I used those. When the fenders were on, I could install the rest of the winch wiring, my auxiliary lights, and my batteries…yes, plural.

I’ve always wanted, and often needed, a dual battery setup on my ATVs. With all the winching, lighting, and miscellaneous electronic equipment, I sometimes find myself with a low battery on a long night ride. Also, when I go a couple months without starting the ATV, I find the slightly low battery makes for a difficult start. I can’t help but wonder if having two batteries would solve this…so I give it a shot. It just so happens that the Bayou 300 is a perfect candidate for it. It has the normal battery mount under the seat, and a dry storage box in the rear fender behind the seat that is the perfect size for another battery, and in this case, the winch solenoid. Below is a pic of the two batteries installed, along with the scores of wires needed for all my accessories.

Dual Batteries

To finish up the wiring for the winch, I use a momentary 3-way toggle switch mounted on the upper left side of the gas tank below the handle bars. I also place a toggle for the rear LED light I will be mounting on the back of the ATV. Now, if you’ve bought a toggle switch at a part store lately, I’m sure you’ve noticed the sub par quality of most part store toggle switches. This is why I will never buy one again; they are total junk. If they can’t hold up to interior use on a vehicle, they most assuredly will not hold up to exterior use on an ATV. For most of my switches, I turn to Del City. Friendly service and great stuff. Anyway, below you see the two toggles, one with the weatherproof rubber boot which works great for ATV applications.

Toggles

So once the internal wiring is completed, I install my accessories. I use two LED flood lights up front wired directly into the headlight harness. The Bayou 300 4×4 has provisions for a lot of Genuine Kawasaki upgrades. One such upgrade offered at dealers was a handlebar mounted headlight similar to that on the 2×4 model. For wiring, there is a set of bullet connectors on the headlight harness under the front fender. These tie into the headlight switch on high beam only. So these are what I used to wire in my flood lights.

Also, I installed a 12v power port on the upper right side of the gas tank under the handlebars. I mounted it flush in the fender bezel. This is the power supply I use for the CB radio that I mounted on the front rack in front of the handlebars. It also works great for recharging cell phones and digital cameras on the trails.

For the CB Radio, I go with the simple Cobra 19 Ultra III. As I’ve stated before, you don’t want an expensive radio on an ATV where it is susceptible to weather and theft. Besides, the 19 Ultra III actually talks pretty well. For the antenna, I use the same type of 64 inch steel whip bottom loader that I use on everything. It seems to do well. I use a short coax and mount it to the rear rack.

And at last, possibly the most useful accessory on a night ride, the rear backup light. For this I use an LED flood purchased at Northern Tool. Now for the pics!

Finish 1 Finish 2

Finish 3

Finish 4 Finish 6

So that pretty much wraps up another long, drawn out ordeal of an ATV project…or does it? I feel an update coming on.

Create a free website or blog at WordPress.com.