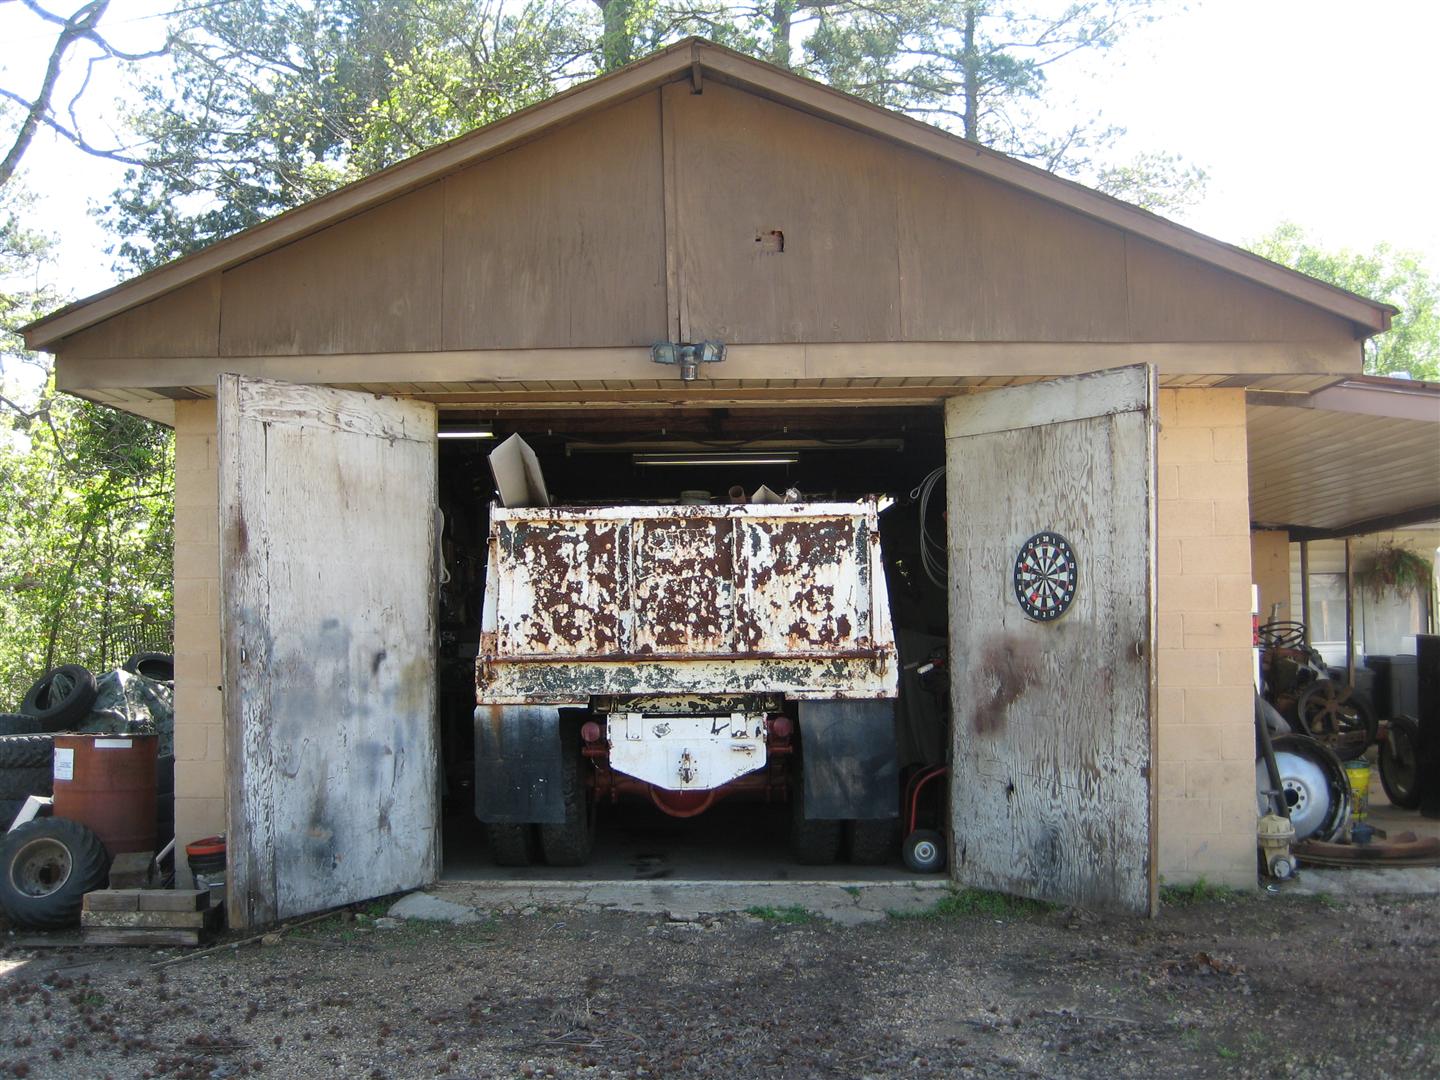
Time for some power brakes! In this sixth installment of the Loadstar Project I’ll be addressing the power brake booster, sometimes referred to as a “hydrovac”. Into the shop it goes…

Now this has been one of the more “pain in the neck” repairs I’ve done to this truck. First off, I knew the main diaphragm in the brake booster was bad. I had a similar booster from my F-700 with a stuck piston but a good diaphragm. I was desperately hoping all I needed for mine was the diaphragm because parts for these, specifically an overhaul kit, are expensive and hard to find. If I could switch out the diaphragm with the F-700 unit, it would be an easy fix. These boosters are not even made anymore, and although a remanufactured booster can be had for around $250.00, I really hadn’t budgeted that in to this project.
So once I had it in the shop I rolled under the truck to begin. The lines and fittings looked rusty and hard to remove, so at first I thought I would try to repair the booster with it mounted on the truck. I removed the main diaphragm cover to reveal, as anticipated, a broken diaphragm. What I did not anticipate was that half of the chamber would be full of old brake fluid which splashed everywhere and was the actual cause of the deteriorated diaphragm. Now, bare in mind this is supposed to be a dry chamber, so the fact that it is full of brake fluid reveals a more sinister problem than a broken diaphragm. It means the piston rod seal is leaking fluid from the cylinder into the diaphragm chamber. This explains why the previous owners told me they were having to add fluid, thinking it was a leaky wheel cylinder.
Time to find an overhaul kit. I searched high and low and found nothing. Finally, I happened across a brake parts remanufacturer’s website called remaninc.com. They had a series of kits in their online catalog, so I just needed to figure out which type of booster I had and locate the correct part number. Like all boosters are supposed to have, there was an aluminum tag on the unit with a series of numbers. These numbers identify the brand and model of booster. I made note of my numbers and searched the website for the rebuild kit for my unit. Unfortunately, my number didn’t pull up anything. However, as a last resort, I called the phone number on the website and they actually have a parts counter for customer support. Surprisingly, the guy I spoke with knew exactly what I had and exactly the correct kit I needed, which they had in stock by the way, and he shipped it out that same day. If I remember correctly, I think the cost was about $85.00. I couldn’t be happier.
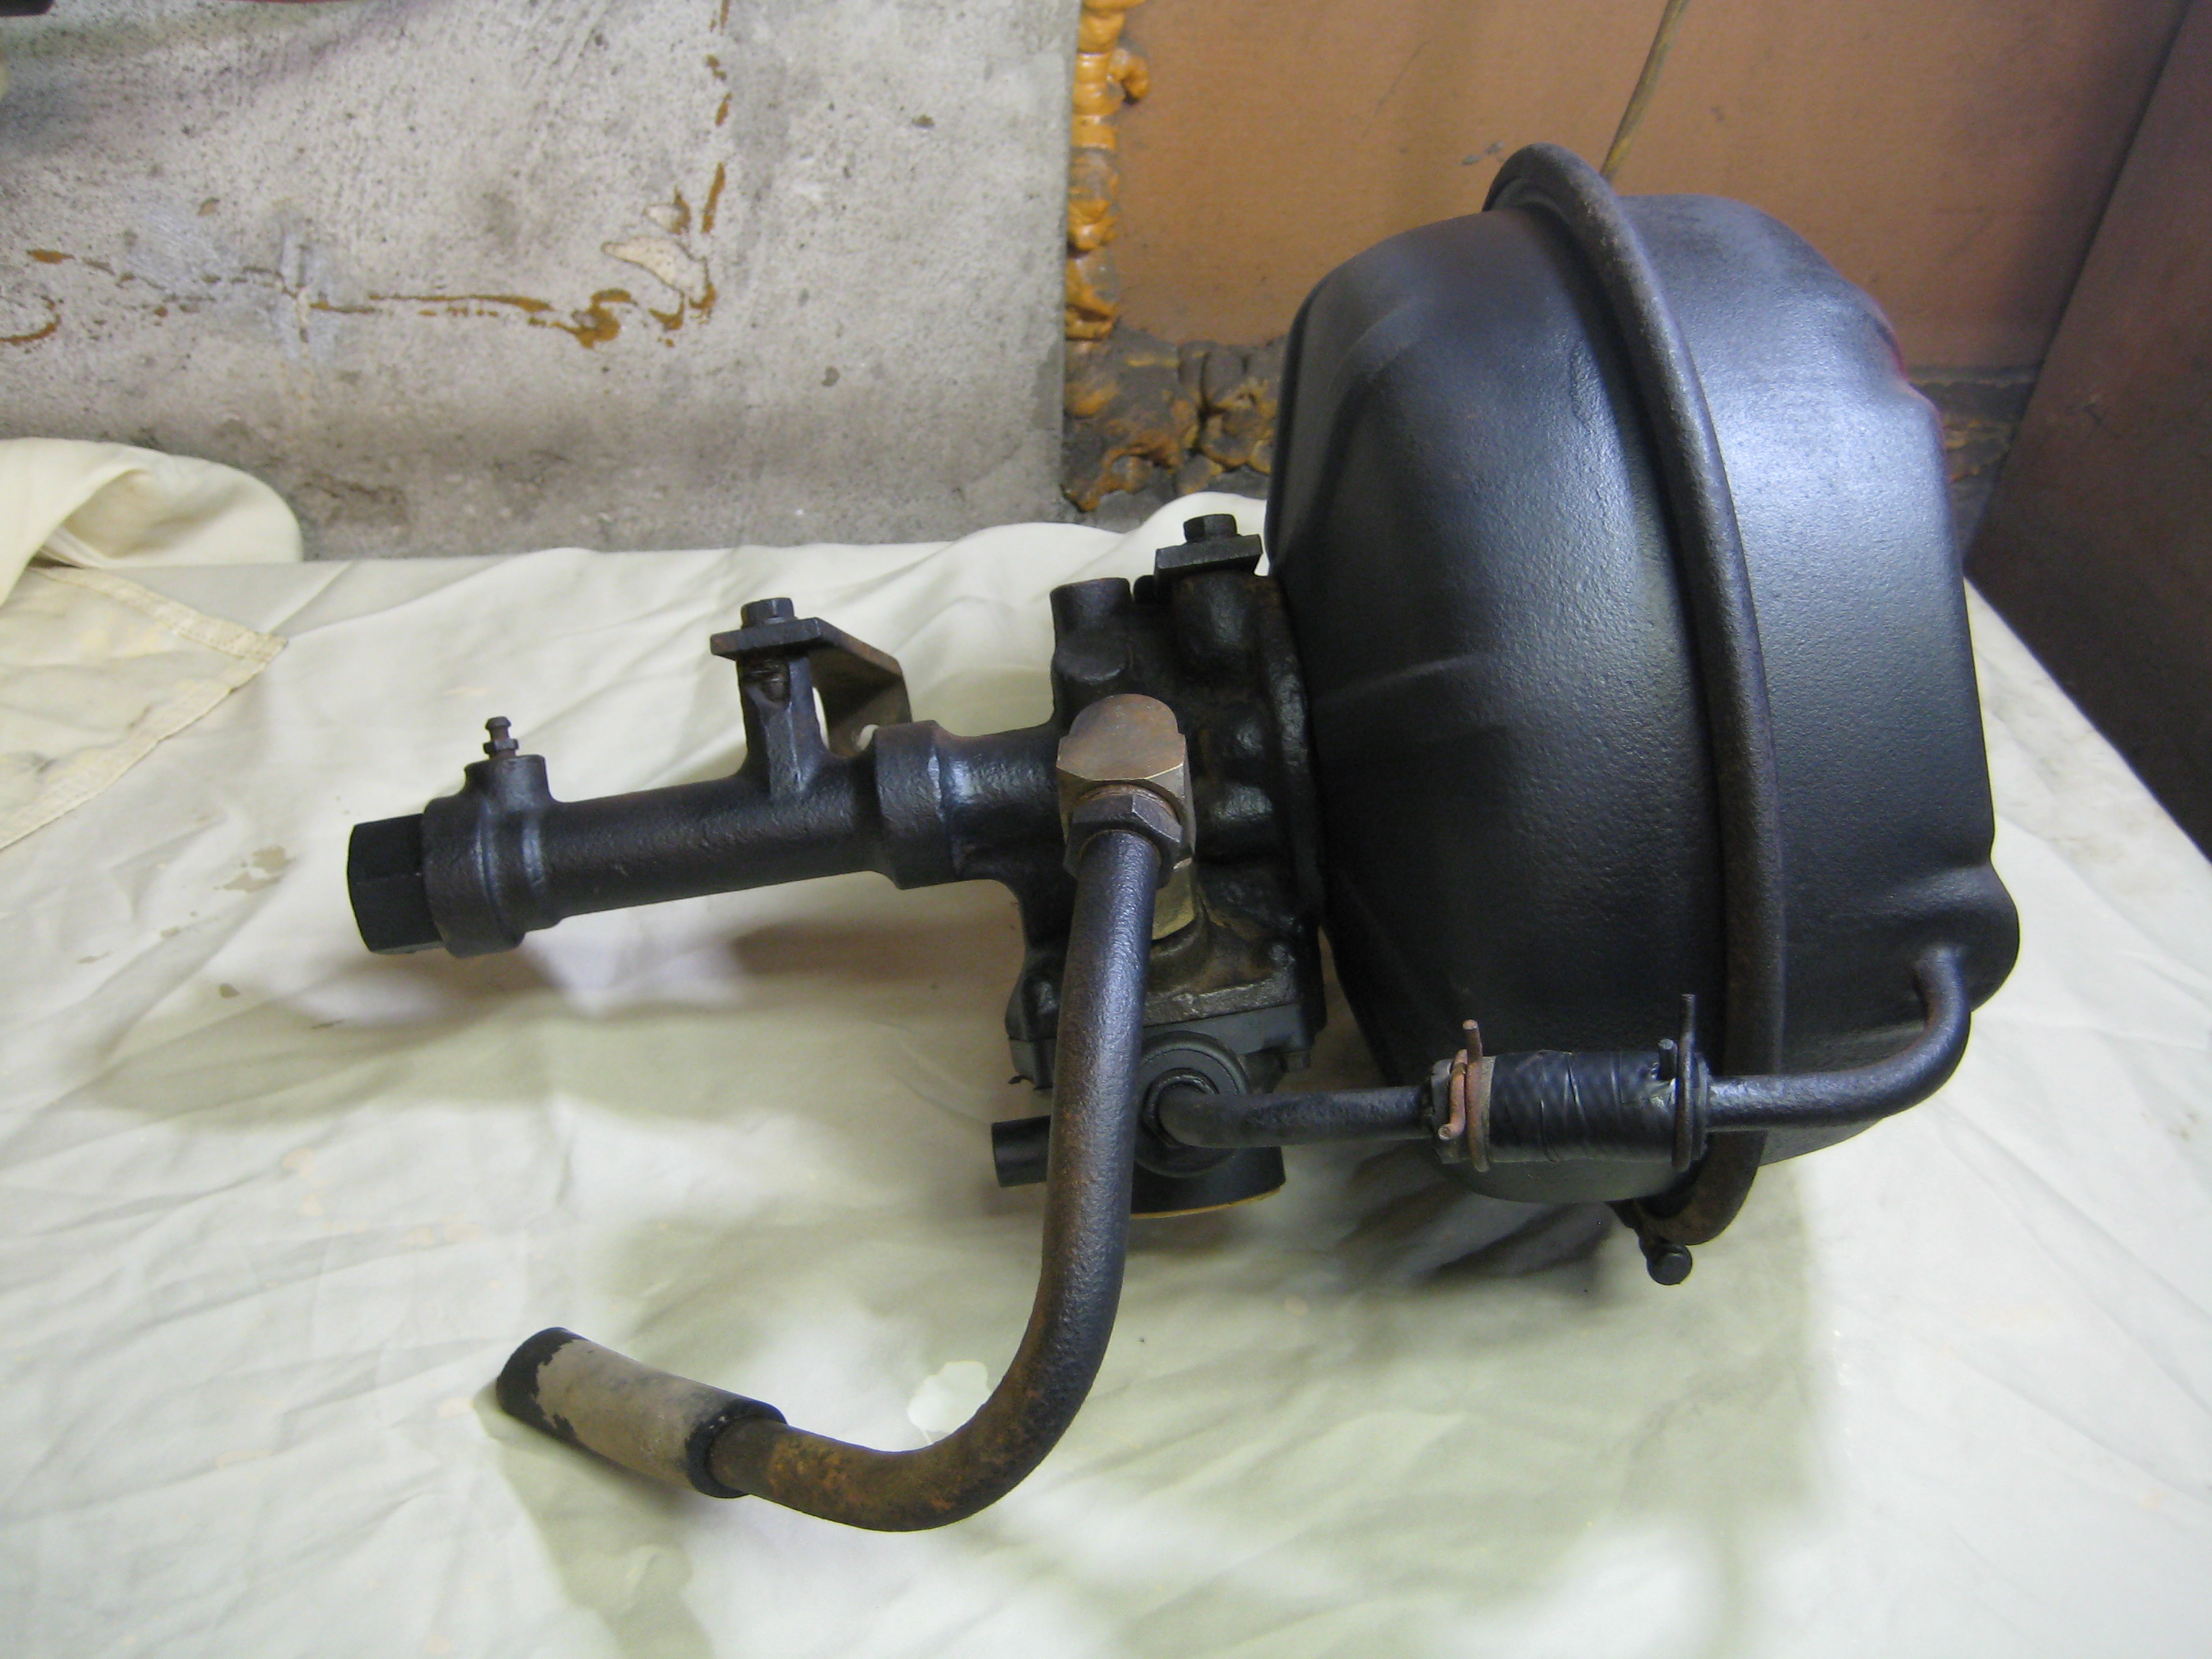
So trying to do this with the unit still on the truck, I now have to remove the steel brake line and the end of the cylinder which is a large nut as seen below, so I can slide the piston and rod out in order to replace the leaking seal:


I went ahead and removed the smaller diaphragm on the bottom along with the springs and other components as everything would have to be cleaned thoroughly and seals replaced.

Now I have to remove the main shaft seal and “retainer” for lack of a better word. This is where the problems begin. The seal and retainer are pressed in. Once the piston was out, I removed the appropriate snap rings and tried to use a punch to drive out the retainer. Fail. I hit it with everything I had and it didn’t budge a bit. It was at this time that I determined I would have to remove the entire unit from the truck so I could put it in my hydraulic press. Below you’ll see a photo of the chamber side. In the very center is the part that I have to press out from behind once the snap ring is removed.

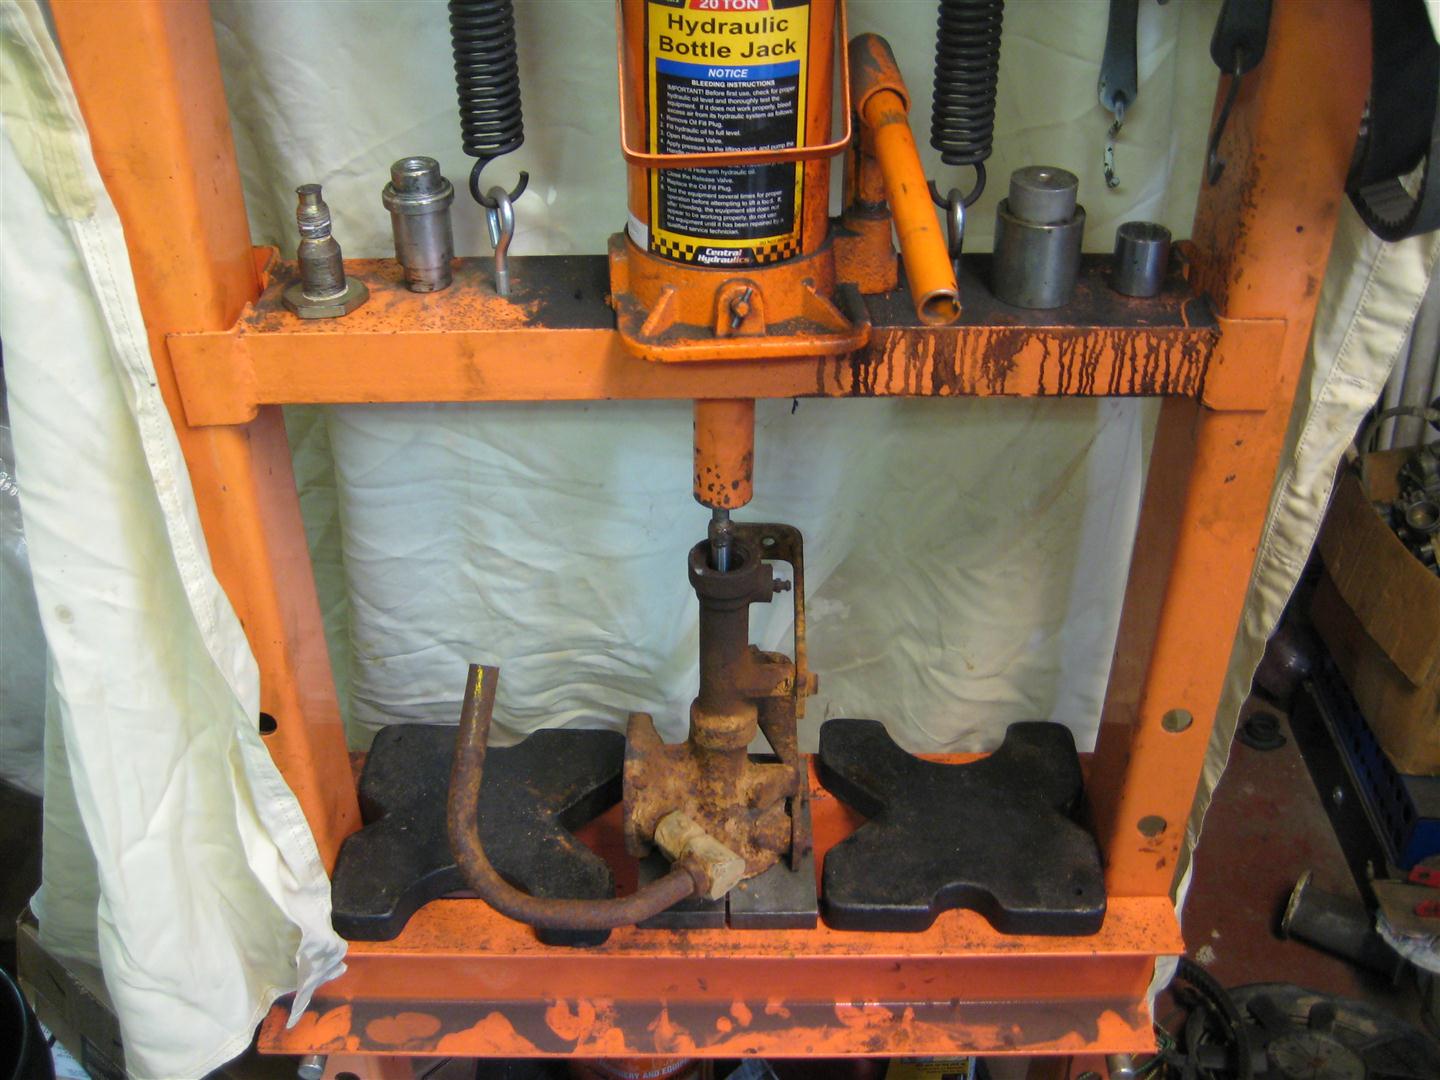
To fit the part in my press, I remove the chamber housing and put the cylinder in the press as shown below:
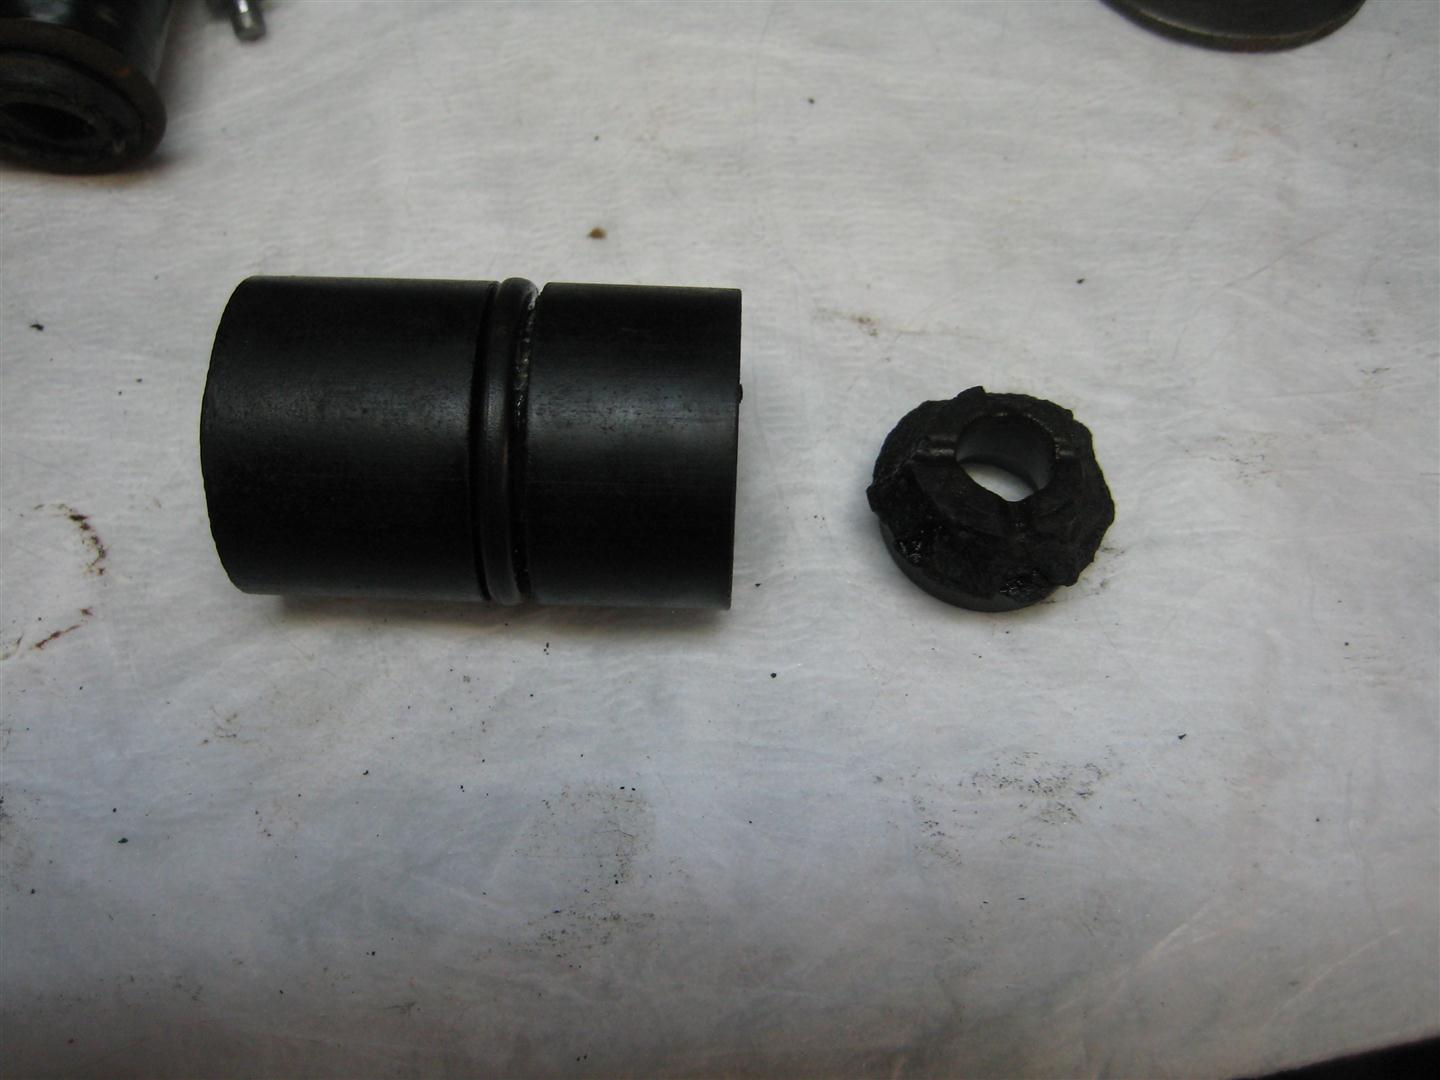
I didn’t have much problems pressing out the retainer and spacer, but the parts being plastic were slightly damaged. Unfortunately, the kit did not come with replacements so I’d have to repair these and reuse them.
So now that I had the entire unit disassembled, it was time to clean. No easy task. As seen below, the parts were heavily rusted. I could only hope the cylinder would take a rebuild, otherwise I just wasted $85 on the kit.

I washed everything in my parts washer and air dried it before bead blasting in my blasting cabinet. I laid out all the parts and the rebuild kit along with the instructions.


I polished the piston and rod with a wire wheel so the seals would travel smoothly. Then I installed the piston cup seal. I also honed out the inside of the cylinder with a brake cylinder hone.
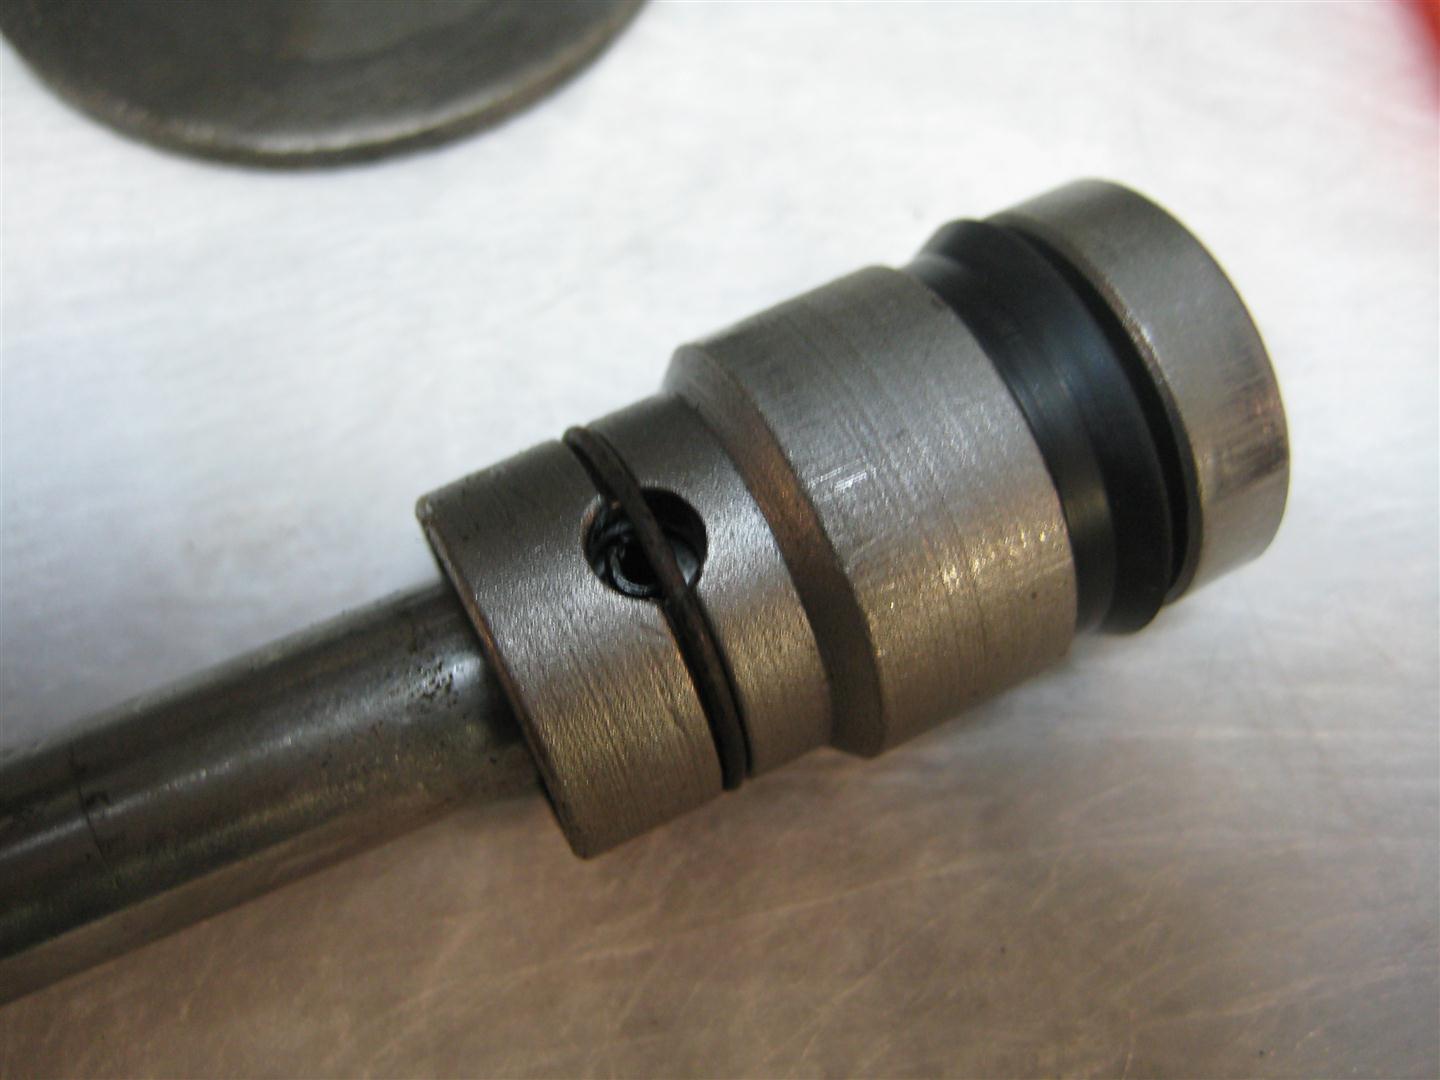
I pressed the seal retainer with the new rod seal and o-ring into the cylinder. Then the entire unit is reassembled the same way it came apart. Now it’s ready to go back on the truck.
Once back on the truck, I manually bleed the system. When adequately bled, the moment of truth arrives. It’s easy to tell if the diaphragm portion works. I start the truck and if the engine dies when I push the brake pedal, the diaphragm is bad. If it stays running and I hear a vacuum sound, it’s good. As for the cylinder portion, I would have to drive the truck to test it.
The verdict: I start the truck and push the pedal. The engine stays running and I hear the booster working. So far so good. I drive the truck out of the shop and hit the brakes hard. The wheels easily lock up. Success! I drive it around the yard and test it thoroughly. I then re-check my brake fluid level. Looks good. The only unusual thing about it is that the brakes are a little slow to release. Other than that, everything works. I now have power brakes on my Loadstar!


Nice write up and pictures. Trying to figure out if I want to buy a 1700 with bad brakes…Have to assume both master and booster will need rebuilding…and all new wheel cylinders, etc… Nice pictures as well. Thanks!
Comment by tereee — April 5, 2014 @ 12:05 am |
Thanks for the comments. The brakes are fairly easy to repair, but of course you’ll figure in the cost when considering the purchase of the truck. The booster is the hardest part, but it’s doable as seen in this post…even easier if you replace the whole unit.
Comment by nfluhart — April 9, 2014 @ 9:49 am |
FYI, people are still reading your Loadstar posts and finding them useful! I personally like Loadstars a lot, and right now I’m looking at a low mileage 1600 flatbed, essentially free for the asking and in generally very good shape – except its brakes are shot like yours were. In my shop that would be manageable, but the truck is about 250 miles away, parked for a couple of years in the “middle of nowhere” on a ranch, and I haven’t figured out any way to tow it home without spending nearly as much as the truck’s worth. I don’t think anything I own could haul something that heavy on a suitably heavy-duty rented trailer, so now I’m debating – with myself – whether I could do the brake system overhaul on location, out in the open and sans shop, and then drive the thing home! Naturally, saner folks tend to think this is a crazy idea… (Did I mention that there are some empty desert stretches and broken mountains to traverse? No Interstates or high speeds necessary, but those brakes would need to work. And I’d need a chase vehicle…)
Comment by Jim — June 4, 2015 @ 5:29 pm |
I guestimate the weight of my truck at 13,000 lbs give or take. I’ve hauled it on a goose neck trailer behind a 3/4 ton pickup with no problem. Driving is not out of the question, just be sure to check tires, fuel lines, brake lines, etc. Fixing the brakes on site is not impossible either but can be tricky if you don’t know which parts you may need. If you get all the way up there only to learn you need to order parts, it can be a major inconvenience.
Comment by nfluhart — June 29, 2015 @ 2:27 pm |
A better way to remove the plunger rod and piston assembly, is not to take the large nut off the end of the cylinder, but to remove the snap ring and washer and pull it out of the back towards the clamshell diaphragm. Leaving the nut on the rod’s threads, you can use the shaft like a slide hammer gently rapping backwards and out it comes. No pressing and no damage to the plastic parts. Once out, to put the cup seal on the shaft between the large black plastic bushing and the black plastic retainer, there’s no need to take the nut off the shaft for this either. Just pull the snap ring on the plunger head/wrist pin down out of it’s groove on one hole far enough to drop the pin out. The snap ring will stay in that position under pressure until you’re ready to put the plunger head back on.
When you have the seals on the shaft, and the plunger head back on, lubricate the shaft’s seals, the bushing o-ring and cylinder bore, and you can push the head of the plunger back in with an orbiting and rotating motion. When the head with the seal cup gets into the cylinder properly, then you can gently tap the end of the shaft with a rubber mallet to finish installing the shaft and black plastic bushing.
In fact, this is the only way to get the black bushing/o-ring and retainer assembly out, it wont go out the other end. The only resistance one should encounter when removing the shaft and plunger assembly, is the friction of the large o-ring holding it into the bore.
Comment by Rollo — September 17, 2015 @ 9:26 pm |
Thanks for the tips. I tried it that way. I removed the snap ring and washer to remove the large plastic bushing. No luck. It was essentially seized in there which is why I had to press it out. This is the first one I’ve done, and it was rusted and filthy making it difficult to even see which components needed to be removed. Anyway, the brakes work great, but the booster is a little slow to release them. Any thoughts on that?
Comment by nfluhart — September 18, 2015 @ 9:16 am |
That sounds like your hydro-vac really was taking on moisture at some point, and now that I look more closely at your pictures, it’s obvious by the rust on the diaphragm plate, return spring and back clamshell cover.
The majority of advice givers on slow releasing brakes say to check at the drums, to see if there’s binding brake shoe components, rusty this or that, etc etc. That’s good wisdom and common sense and should be done at some point. I doubt that’s the problem. Many other forums and mechanics suggest it’s collapsing rubber brake lines causing problems, especially ones as old as these Binders are. Again, great advice and something that should be replaced for safety reasons, and could be a contributing factor. Similar to plaque in a heart artery, when pressure is relieved in the hose, deteriorating lining on the inside can create weird effects.
I’m more leaning towards a vacuum problem, or lack thereof, and I’d check for leaks from the manifold back, down to the hydro-vac checking clamps, fittings, making sure there’s no collapsing of that hose, no leaks there. Once that is determined that you have proper vacuum to the booster ruling all that stuff out, then I’d focus on what I think is really the problem.
The control unit on the bottom of the hydro-vac. It has a poppet valve with small return spring, a diaphragm with it’s own plunger/shaft with cup seal, etc etc.
This is what controls the atmospheric pressure at the appropriate time in the back half of the large clamshell’s chamber, behind the big rubber diaphragm.
when the engine is running and there’s good manifold vacuum to the booster, BOTH sides of the rubber diaphragm have vacuum, and the large spring keeps the rubber in normal position. When you step on the brake pedal, brake fluid under hydraulic pressure activates the control unit (that black plastic item on the bottom of the hydro-vac) and it shuts off vacuum to the back half of the clamshell, and also opens the back half up to normal atmospheric pressure. It draws that air from the other hose that goes up to the air cleaner. It draws fresh and clean air from the air cleaner down the hose, into the back of clamshell behind the rubber normalizing the back half with the outside world.
So when you have normal air pressure behind the rubber, and still have the vacuum on the front part of the clamshell, it overcomes the large spring and sucks the piston into the slave cylinder which assists in putting the brakes on.
When you release the brakes the control unit shuts off outside air from the air cleaner hose, and the back half of he clamshell, behind the large rubber diaphragm gets vacuum applied to it again. This same-same pressure, or lack there of on both sides of the rubber allows the spring to push the diaphragm backwards, along with the slave cylinder piston, back out of the bore and ready for the next brake pedal push. (That tube that comes off the back of the back cover and connects with the control unit and has the 4″ or so piece of rubber hose connector is how air/air pressure is transferred)
Something in the control unit is making this process go slow for some reason. Vacuum leak where there shouldn’t be, the plunger is sticking in the bore of the unit and the spring is having a hard time overcoming this, or the spring is weak. Crud still in the galleys of this plunger.
Were you able to remove the bottom cover of this control unit, and replace the two piece white plastic poppet valve and seal? This is the low end of things and incredible gunk gets deposited there. Most hydro-vacs I’ve seen have lost this bottom cover, which doesn’t allow it to draw clean air from the hose going to the air cleaner, but draws air right there… at the bottom of the unit exposed right to the elements under the truck.
That’s my 2ct’s worth guess of where to start looking. Anyone else familiar with these hydro-vacs, please jump in and correct me if I’ve made any errors in describing the process, but this is how I’ve interpreted the process from manuals, forums and rebuilding.
One thing to keep in mind with this type of braking system, is that there is no fail safe backup. Meaning these are not a split system like modern vehicles, where if you lose your back brakes you still have the front, or vice versa. Any compromising to this system means catastrophic brake failure. A major brake fluid leak anywhere in the system, or broken hose and you will lose all braking. That’s why it’s a good idea to have the hand brake in good repair, with good shoes on it and adjusted properly, as it works on the end of the transmission/start of the drive shaft and could possibly be your best friend.
These hydro-vacs are highly recommended to be bled by a power bleeder, not manually to get all the air out of the system. Bendix has a specific bleeding order on the master cylinder, then the two bleeders on the hydro-vac, then to the far rear wheel working forward. Bleeding must be done with the engine OFF to prevent damage to the booster.
The #1 failure reason reported by the manufacturers is gasoline vapors being drawn into the booster. Maintaining a properly tuned carburetor is essential to keeping gas from reaching the rubber components, as is a properly functioning check valve in the vacuum hose that is higher than the port on the intake manifold.
Comment by Rollo — September 19, 2015 @ 1:57 am |
Thanks for all the information. I’m also leaning toward the control unit on the bottom of the hydro-vac. All the rubber lines on the truck are new. When the problem first occurred, the brakes were slow to release. Over time, and the more the truck set up, the slow release transitioned to totally sticking. I could shut off the engine or tap on the hydro-vac and the brakes would release. Now, after setting up even longer, when they stick, they are stuck for a long time regardless of engine on or off. I’m working on a different project now, but when I get time I’ll return to the Loadstar.
Comment by nfluhart — October 25, 2015 @ 5:28 pm |
Awesome documentation on your Loadstar project.. I’m waiting on bring home mine that I bought last year… being on a fixed income does have its disadvantages.. I’ve been thinking of reworking the brake system put in new steel lines, for a truck that was made in 1977.. its bound to have rust on inside of the lines.. also local tow company refuses to tow it 35 miles.. pefering to only take it on the interstate told me the tires were dry rotted and rims needed replacement (rusted split rims)..
Comment by Richard — April 9, 2020 @ 2:58 am |
Thanks and good luck with your project. Just something to think about…you can easily haul these trucks on a goose neck trailer behind a 1-ton pickup. When I initially purchased mine, we drove it home a good 15-20 miles with rotted tires and no brakes except for the parking brake. But I have since hauled it behind a 3/4 ton truck, no problem.
Comment by Nicholas Fluhart — April 9, 2020 @ 12:45 pm |
Hi, I’m currently working on an Loadstar 1600 4×4 firetruck.
It was our own firetruck wich we now try to keep running to attend old-timer meetings and public relation events.
However we have some problems with the brakes, and we are getting nowhere at the moment.
The symptoms are: -nothing much happens when you start to operate the brake pedal, and than you get allot in a very short time.
-there also seems to be some residual braking pressure after normal branking.
We have tried allot of different things, and everything in the system has been replaced or has had a revision.
I did some reading of the origional documentation wich brought me to the following.
It could be possible that they replaced the master cylinder with a model without a double check valve, and I believe that the booster (wich is the same model as the one on your truck also has no double check valve.
Could this be the cause of the symptoms? And if so, could I send you some pictures of the master cylinder for you opinion?
Best regards
Koen
Belgium
Comment by Koen Goossens — February 5, 2022 @ 11:37 am |
Mine was having the same issue, pretty much exactly…delayed braking and residual pressure. Eventually, the brakes locked up altogether as pressure remained on the system after the pedal was released. I found that if I get under the truck and tap on the cylinder portion of the booster, the brakes would free up. I’m thinking the smaller diaphragm in the booster is sticking. The shaft was fairly rusty when I rebuilt it and the return spring may be weak, so when I get time I plan to pull it apart and polish the bore and shaft and see if that fixes it. If you get yours fixed, let me know and I’ll do the same. Thanks
Comment by Nicholas Fluhart — April 3, 2022 @ 2:22 pm |