I completed an interesting project a while back. It is a 1989 Yamaha 350 Moto-4. I love old machines! These bikes were the predecessor to the 2WD version of the Big Bear. This was a very heavy-duty machine, and as such there were some very interesting industrial variations of it that were groundbreaking in the industry. One of these was the Terrapro which had, to my knowledge, the only Power Take Off (PTO) available on a four wheeler. It had a variety of very functional attachments available from Yamaha, such as a rough cut mower, finish mower, tiller, etc. The other innovative spin-off was the Pro Hauler, which utilized what is considered the first ATV cargo bed. In contrast, the 350 Moto-4, while industrial at heart with it’s Hi/Lo 10-Speed transmission, is more of a general purpose utility ATV.
I stumbled into it almost unintentionally. I purchased a group of ATV’s in south east Arkansas and this one was in the lot. I essentially got it for free. It looked fairly junky and I didn’t have any specific interest in it at the time, so it was unloaded and hauled around back where it stayed for a few months. Here’s a video clip of me unloading it at my shop:
When I bought this quad, I never intended to do anything but scrap it. My initial thought was to either sell a few easy parts, such as the carb, CDI, etc., and scrap the rest, or perhaps sell it whole as-is for parts or a project bike. However, upon closer inspection, I noticed a few things that grabbed my attention: The bike still had the factory original tires on it, which were in good shape. All the wheel bearings and seals were in good condition. Although the cosmetic condition was very weathered, the bike was remarkably untouched and noticeably sound overall.
So what does all this mean? It means that the bike probably didn’t have any real hours on it, and thus the mechanical condition was likely in decent shape requiring only minor restoration. My theory was that the bike was adult owned and ridden for most of its life and perhaps was later passed down to a kid who promptly broke it and left it out in the weather for a couple of years. With this in mind, I decided to see what it might take to get it running. If it could be repaired easily, I could fix it up and it would be worth around $1200 to $1500. So I pulled it up in the shop…
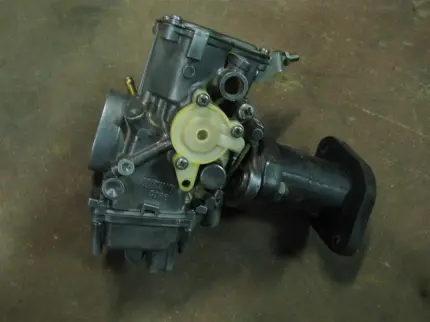
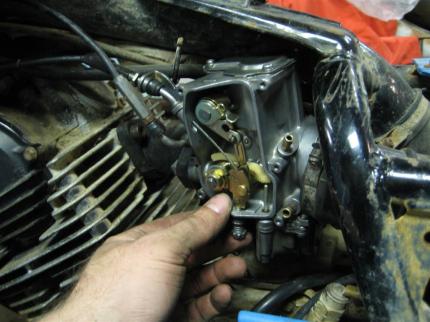
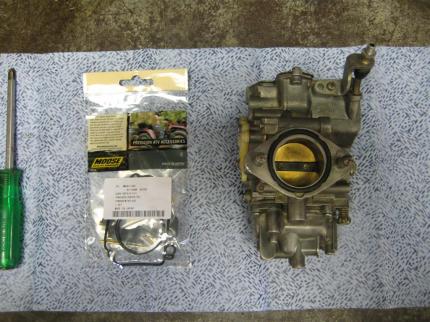
As I looked it over, I made a few notes. The one thing I knew it needed immediately was a carburetor and a hot battery. I already knew the chassis was in good shape, so if the engine ran good, all it would need was a quick cosmetic restoration. The good thing about being in the parts business is that I usually have a few spare parts laying around. While I didn’t have a carburetor for a 350 Moto-4, I did have one for a 350 Warrior so I decided to make it work. I cleaned it thoroughly and found an intake boot. I then installed the assembly using the Warrior throttle cable (P.S. The aftermarket intake boot is ridiculously fragile. They split easily. I went through two of them on this project).
|
|
|
Well, good news and bad news. The good news is that the engine ran. The bad news is that it was a total travesty. The jets in the Warrior carb were too rich for a stock setup, so it ran poorly and smoked. Also, the cam chain in the engine was rattling and the starter clutch was going out. Decision time: Do I scrap the project or order some parts? For me to make any money on this thing, I need my total investment to be $500 or less. So I needed to guesstimate my total parts bill if I fixed this thing from one end to the other in order to sell it for a good price. It’s always a bit of a gamble, but I ran some loose numbers and given my access to used parts and my discounts on new parts, my figures indicated I should be OK. Theoretically.
So I went for it. I ordered a carburetor kit for around $20 and a D.I.D. cam chain for $25. For the starter clutch, I went used. I got on eBay and won an auction for a Warrior flywheel, starter clutch, stator assembly, and stator case, all for $55 (the Warrior and Moto-4 starter clutches are interchangeable). I only needed the starter clutch, so I kept that and resold the bare flywheel for $35, and the stator w/case for $85. So that puts my total parts bill thus far at -$20. I’ve already made 20 bucks and I haven’t even done anything! I love eBay! Moving on…
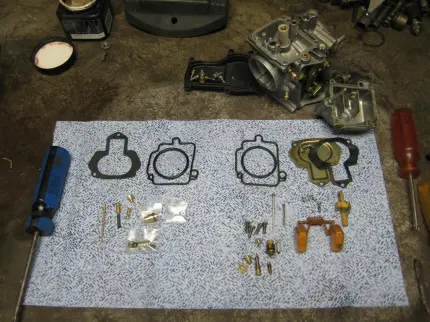
So I pulled the carb back out and installed the kit:
|
|
|
Using the stock jets seemed to fix my rich burn problem. The engine ran pretty good, albeit noisily. I jumped on it to test drive it and check the clutch and transmission. It actually drove pretty good and had a lot of power, but unfortunately it revealed a few other problems. The engine smoke didn’t clear up and the centrifugal clutch wouldn’t disengage. This project, like most, was rapidly snowballing.
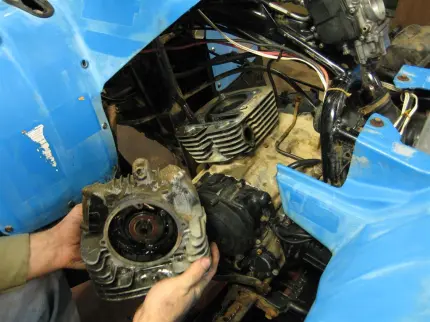
Oh well…in for a penny, in for a pound. I decided to disassemble the engine and assess the damage. If my hunch was right, all it would need is a set of rings, and since I already had to partially disassemble the engine to replace the cam chain and starter clutch, it would only take a few more steps to install a set of piston rings.
First I addressed the centrifugal clutch issue. It turns out that the shoe springs had fallen off somehow and were digested by the transmission. Hmm….I’ve never quite seen that happen before, but there’s a first time for everything. After ordering and receiving the wrong springs twice, I decided to replace the entire centrifugal clutch assembly with one I had on the shelf which was out of a 1995 Kodiak 400. Success!
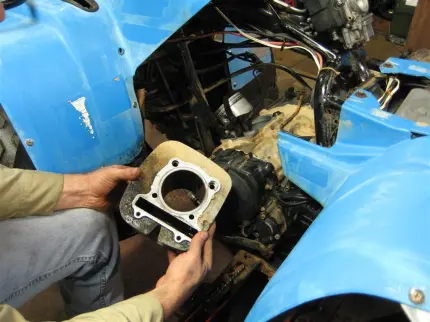
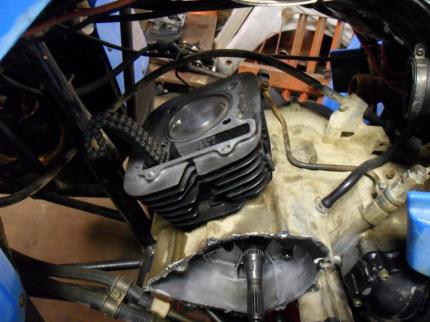
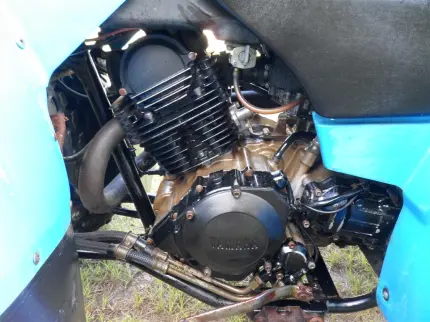
Then I began the main teardown. I removed the head, cylinder, and then the stator and case and of course the flywheel/starter clutch assembly (this requires a special tool) and I was then able to remove the cam chain.
|
|
|
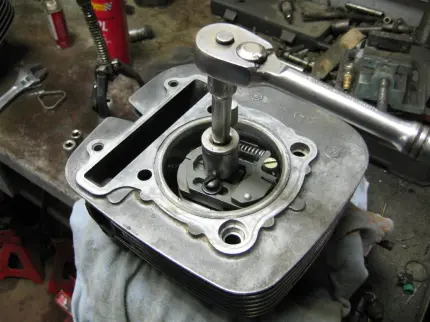
Once removed, I saw that the piston rings were worn. I made note of the size and ordered a set for around $20. The cylinder was in decent shape for the most part, but there was a slight ring ridge at the top. Rather than risk breaking my new rings, I used a Zimmerman Ridge Reamer to remove the ring ridge. Some of you old-timers may know what that tool is. It’s a cutting tool invented by Herman W. Zimmerman in 1935 that’s designed to cut ring ridges much like a boring bar would. It worked perfectly. I then honed the cylinder and installed the new rings.
|
|
|
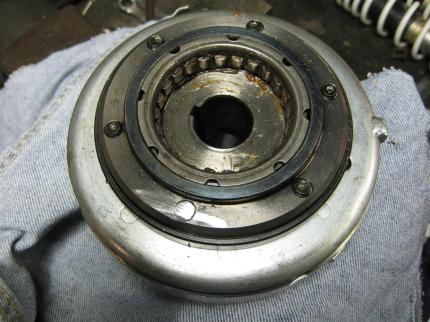
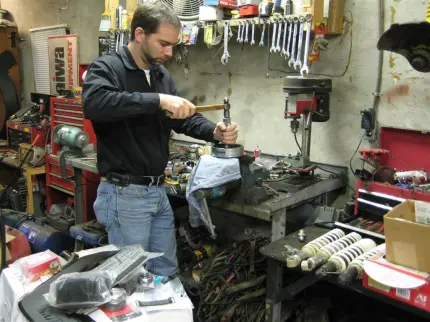
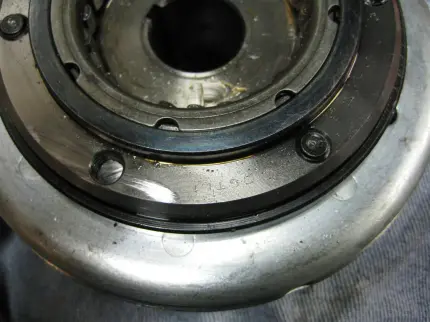
To install the new starter clutch sprag, I first had to remove it from the Warrior flywheel and install it on the Moto-4 flywheel. While many would mistakenly believe the two flywheels are interchangeable, they are not. If you look closely you will see the ignition pickup surface is longer on the Moto-4 and is located in a different position.
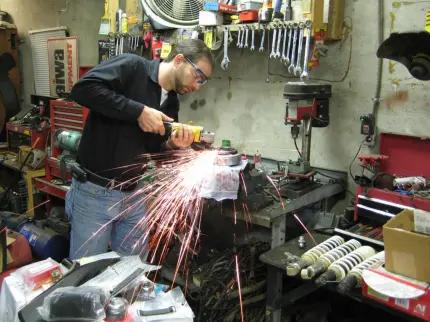
It is very difficult to get the bolts out of these because when the factory installed them, they took a punch and smacked the end of the bolt after it had threaded through. This was to swell the threads and prevent the bolt from becoming loose. Since they are Allen bolts, you can’t get much torque on them without rounding them off. So what do you do?
I took my angle grinder and gently ground off the swelled end portion of each punched bolt. I ground it down smooth with the surface as seen below.
|
|
|
I was then able to take my impact driver and remove the bolts manually.
|
|
|
Then it was time to install everything. It worked out good. The engine started smoothly with the new starter clutch. It ran quiet with the new cam chain and did not smoke with the new rings. It also shifted perfectly with the new centrifugal clutch. So now I’ve got a good, running ATV with only about a $20 parts bill and lots upon lots of labor. Oh, and it still looks like trot-line weight. So now it’s on to cosmetics…
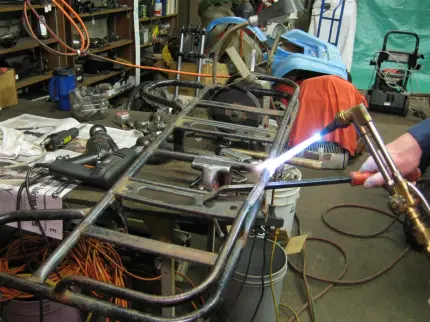
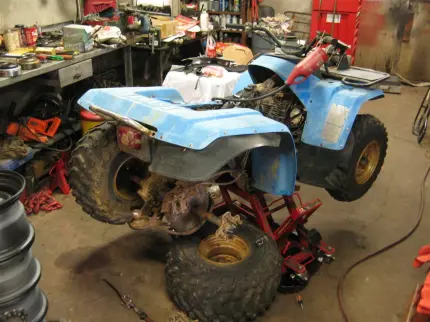
I pulled all the racks to straighten and paint them. The rear rack had a noticeable bend in the top bar, so I had to use my torch to heat it until the metal was glowing and soft. I then took my pry-bar and straightened it.
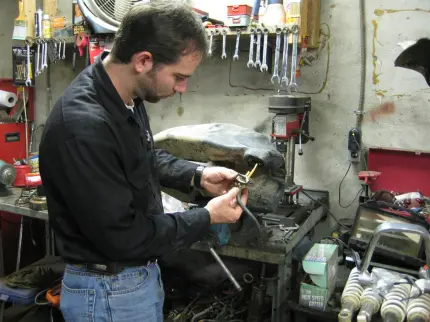
While I had the racks, seat, and gas tank removed, I went ahead and sent the seat to be recovered ($40) and I fixed a leak in the gas valve as seen below. It was also a good time to wet-sand the fenders to bring the color back to them. I then replaced the left rear mud flap with a New Old Stock (NOS) flap I had on the shelf. I also fixed the tail light and installed a new lens that I had on the shelf.
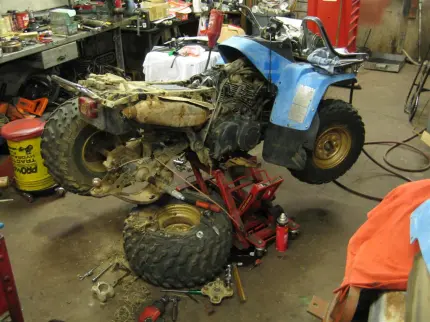
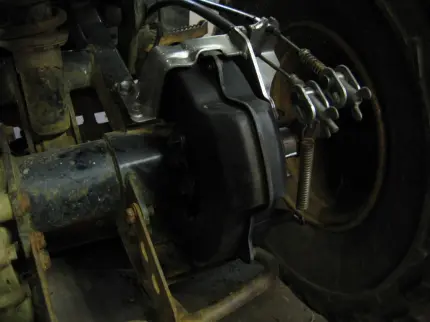
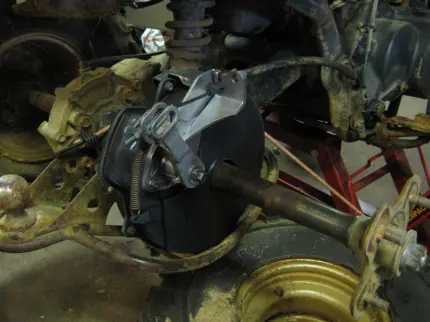
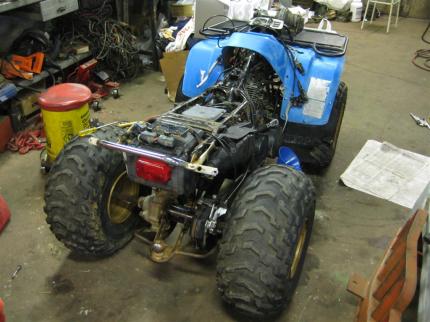
The last little bit I had to do was fix the rear brakes. It utilizes a cable-operated mechanical disc brake. I had to replace the hand cable, but the foot cable was good. Fortunately, the pads and caliper were in good shape. All I really had to do was clean and properly adjust everything.
I pulled the right rear wheel off to assess the situation, then I disassembled the brake assembly:
|
|
|
I cleaned and painted everything. It worked like a new one.
|
|
|
After the cosmetics were cleaned, painted, polished, and whatever else needed, I began the most important part: installing my favorite accessories.
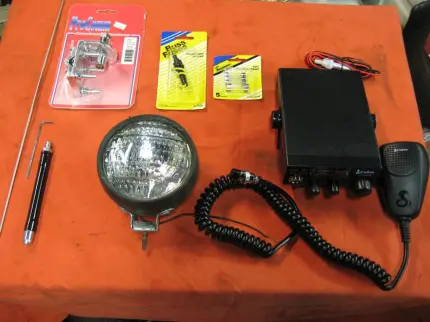
I generally utilize the same type of accessories on all of my utility ATV’s. Although I’m building this one to sell, I still may use it around the yard or as a backup until it sells, and I like to have all the features I’m used to. These include: auxiliary lighting (specifically on the rear), CB radio, and a good winch.
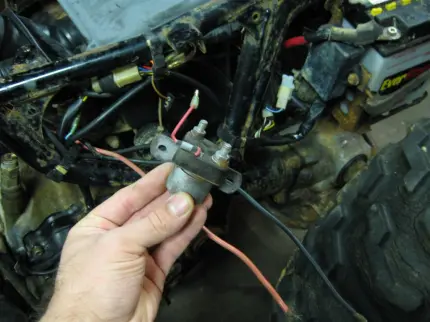
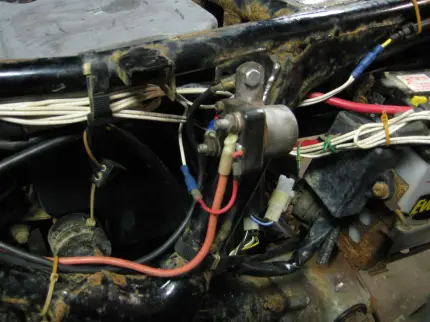
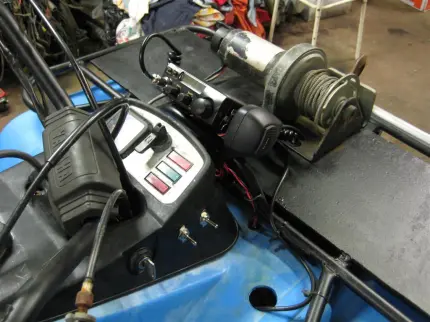
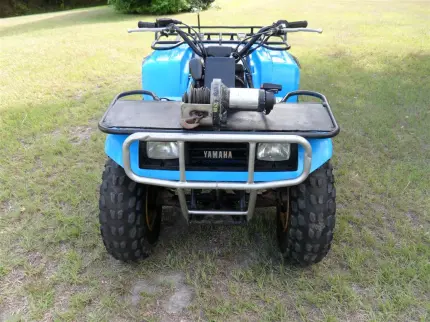
I started with the winch. This ATV already had a winch, but not much more. There was no auxiliary winch solenoid or wiring. The winch was an old-school 2,000 lbs Super Winch mounted to a thick steel plate on the front rack. It worked great but needed to be wired properly. First, I needed a solenoid. I had a good single-wire unit on the shelf, likely from a Polaris. I found a place to mount and ground it to the frame. Then I wired from the winch, where the main operation toggle was located, to the battery. I then wired a master On/Off switch so the solenoid would not engage and the winch could not be operated unless the main switch was in the “on” position. This is a safety feature that prevents the winch from accidentally engaging when not in use.
|
|
|
Once the winch was taken care of, I proceeded to the other accessories:
I installed the CB radio and antenna. The radio is a Cobra 19 Ultra III. It actually talks very well for a less expensive radio. The idea is to use a small, less expensive radio, not because I’m cheap, but because it will see rough service and potentially some weather, so if it breaks you do not want to be using a 29 LTD Classic. Next I installed the rear light and wired it to a toggle switch next to the master switch for the winch.
|
|
|
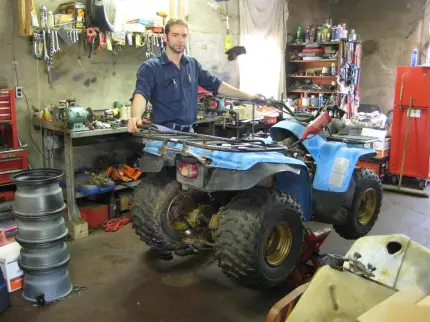
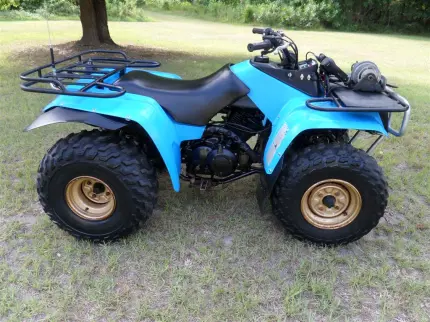
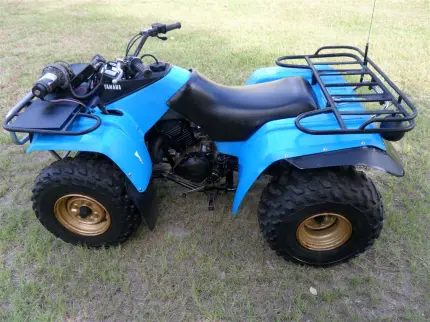
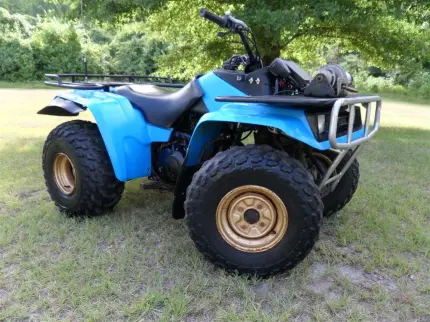
And that pretty much concludes this long ordeal of a project. I kept the quad for a few months, using it around the yard. It was a smooth riding machine with a very tight turning radius. I really enjoyed it. In fact, I would have liked to have kept it for a yard quad, but I’m limited on space so I had to make room for the next one. Here’s what it looks like now…
|
|
|
|
|
|
|
|
|
My total parts and supplies bill was very nominal, and after enjoying the quad for a few months, I sold it for $1300. Although the whole thing snowballed into much more than I had anticipated, it was a fun, profitable project. That’s all I can ask for. On to the next one!



Boy did that thing look good in the end.
Comment by Philip — December 5, 2010 @ 9:09 pm |
Thanks. That’s what makes it all worth it. Remember Steve had one similar to this when we were kids? His was a 225.
Comment by nfluhart — December 6, 2010 @ 8:01 am |
I have a 1989 moto4 350 and I am thinking the CDI is out. I cant find one. What other model will cross over for this part?
Comment by Rob — April 30, 2011 @ 2:46 pm |
Unfortunately, CDI’s were exclusive for that year, meaning an ’89 model is the only one that will work. However, the 1989 Big Bear 350 4×4 uses the same part number according to Yamaha, so that at least gives you one more option in finding one. A new one, if still available, is $613.47 if you can believe it, so finding a used one will definitely be the way to go. Worst case scenario, you can go with a newer year model unit that is easier to find, but that would require changing out the stator, harness, and possibly other components.
-Nicholas
Comment by nfluhart — April 30, 2011 @ 3:11 pm |
Do u know what other clutch pack will fit a 95 yamaha Kodak centrifugal clutch
Comment by joe — May 27, 2011 @ 8:15 am |
I believe the 350 Big Bear 2WD and 4WD will work, as well as the 350 Wolverine and Moto-4. It’s also possible the 400 Big Bear would work, but I would confirm some part numbers and/or compare the parts before purchasing one.
Comment by nfluhart — May 27, 2011 @ 4:12 pm |
i have a moto 4 350 that i think the centrifugal clutch is out of is there anything i can do instead of buying a 400 dollar part?? like is there anything i could switch over from a warrior?
Comment by Tyler — August 23, 2011 @ 4:09 pm |
The Moto-4 has two clutches, a centrifugal and a main clutch. The Warrior has only one, a main clutch, so it won’t be any help to you if you are sure that your problem is the centrifugal clutch. The early Moto-4 350’s through about 1989 used a centrifugal clutch with no outer retainer plate. I have a good one I would sell for $75. The shoes and drum are in great shape, comes with the one-way bearing sprag, but it is missing two shoe springs which can be purchased from Yamaha rather cheap. The later models had the outer retainer plate on the clutch pack, which was apparently added to prevent the shoe springs from coming off, and I have one of those also. It is ready to go for $120. Both types of clutches are interchangeable, so regardless which year model you have, either type will work. As I discuss in my post here, I used a clutch from a 400 Kodiak. The compatible clutches for the 350 Moto-4 are the Big Bear, 400 Kodiak, and possibly the Wolverine.
Comment by nfluhart — August 24, 2011 @ 7:46 pm |
Awsome job on your quad looks great. I just bought a project for 100 bucks .85 moto 4 250. Has high and low range reverse 1 and 2 gear but no 345 so excited to learn.
Comment by Ian — January 25, 2017 @ 2:57 pm
It’s fun to dig into these old things. Honestly, you can buy a complete bottom end off eBay much easier than repairing the transmission, but if you want to do it for the experience than dig in. About the only special tool I think you may need will be a flywheel puller. A good impact driver will be helpful. It is different than the 350 in my post and if you can’t find a shop that has one, you may end up having to make one. In ’85 most of the case bolts were philips head and notorious for rounding off. A good impact driver will be a big help. Pay close attention to all the little shims that are going to fall everywhere when dealing with the gears/shafts. If one gets out of place it won’t shift right and you’ll have to take it all apart again. Ask me how I know. LOL Should be able to source the parts really cheap on eBay. Good luck!
Comment by Nicholas Fluhart — September 20, 2017 @ 9:56 am
is there any number or email address i can contact you on bc i’ll buy that from you right now!!!
Comment by Tyler — August 25, 2011 @ 11:22 am |
I’ve sent you an email with my contact info…
Comment by nfluhart — August 25, 2011 @ 7:12 pm |
Excellent job Nicolas! I’m an aircraft mechanic who also works on cars, lawn mowers,etc but I’ve done very little work on motorcycles and atv’s. Really enjoyed viewing and reading your project step by step and am very impressed with your knowledge, mechanical skills and attention to detail. Thanks,John
Comment by John P — November 5, 2011 @ 12:11 am |
Thanks for the comments John. I have a lot of other projects to post as well, if only I had more time to blog. I’ll get them posted slowly but surely, and hopefully you’ll find a few more that are enjoyable to read.
Comment by nfluhart — November 5, 2011 @ 5:45 pm |
can u hear people talking on the cb radio while u are going fast down the road i might do the same thing but i don;t know if i will hear truckers Josh
Comment by Josh Koetsier — November 25, 2011 @ 3:03 pm |
It depends on a few thing…wind, exhaust noise, etc. If you have trouble hearing it, you’ve got a couple options. You can mount a small external speaker positioned directly toward you. There is a port on the back of cb and it plugs in. Or, you can use ear phones. Again, they plug right in the back.
Comment by nfluhart — November 29, 2011 @ 10:44 am |
Nice job on the atv.
I just picked up a 1988 moto 4. Like you i need to locate a carb.
Any suggestions which carbs cross fit?
Thanks.
Comment by Tom. A — February 17, 2012 @ 12:03 pm |
Thanks for the comment. Any of the 350 carbs, such as Warrior, Big Bear, etc. or the Kodiak 400 carbs can be made to work on the Moto-4 relatively easily. Most of the later model stuff (1990’s) uses a single throttle cable design instead of the dual cable setup on the older models, so if you find a single cable carburetor such as on a Warrior for example, simply use the Warrior throttle cable. It is long enough and it will hook into your thumb throttle assembly as they are identical. Same goes for the Big Bear and the Kodiak. Then it’s just a matter of jetting the carb to work on your Moto-4. I would buy a standard Moto-4 carburetor kit. It will come with the jets and everything you need. Those parts will make the fuel mixture compatible for your Moto-4.
Comment by nfluhart — February 24, 2012 @ 1:30 pm |
You mention in the tear down “then the stator and case and of course the flywheel/starter clutch assembly (this requires a special tool)”. I’m trying to remove the same thing but don’t have the special tool. Do you have a picture of it, how to use it or know where to get one? I’d like to get one on Ebay, but haven’t been able to find one yet.
Comment by Tim — March 11, 2012 @ 11:10 am |
Here’s one on eBay for a good price:
http://www.ebay.com/itm/FLYWHEEL-PULLER-YAMAHA-WARRIOR-YFM-350-400-660-700-R-EX250-X-RAPTOR-/110840204564?pt=Motors_Automotive_Tools&hash=item19ce974d14&vxp=mtr
Comment by nfluhart — March 12, 2012 @ 12:54 pm |
I have picked one up as well i payed $30.00 for it it is all there except the carb and clutch/or break hardware for the left handle bar i have not really looked it over yet. I am how ever in the middle of another small project at this time. I am looking for a carb can you tell what will interchange with it?
Comment by Tony — September 19, 2012 @ 2:22 pm |
The early 350’s had a dual cable carburetor. They are hard to find. I sold my last one a couple months ago for $250. On my Moto-4, as noted in the post, I actually used a 350 Warrior Carburetor. In fact, any of the old Yamaha 350 flange mount carburetors can be made to work. The flange mount type are the ones that bolt to the intake boot on the head, as apposed to sliding in the boot and securing with a clamp. The clamp style can also be made to work, but you would need a clamp style intake boot as well. I used the Warrior throttle cable which screws right into the throttle with no modifications. However, you will want to use the Moto-4 jet size in any type of carburetor you use for it.
Comment by nfluhart — September 20, 2012 @ 1:30 pm |
i am looking for a carb for the the same atv i pulled out of a field would you by chance happen to have another rebuildable carb you would be willing to sell cheap………. i cnat seam to gey the original type so i am willing to utilize anything i can to make it work. and if you have any ideas you can leave me let me know
Comment by Anthony — October 7, 2012 @ 11:46 am |
Unfortunately, I do not have a carburetor at this time. However, any of the old Yamaha 350 flange mount carburetors can be made to work. The flange mount type are the ones that bolt to the intake boot on the head, as apposed to sliding in the boot and securing with a clamp. The clamp style can also be made to work, but you would need a clamp style intake boot as well. Just use the appropriate throttle cable with whichever carb you choose. I used the Warrior throttle cable which screws right into the throttle with no modifications. However, you will want to use the Moto-4 jet size in any type of carburetor you use for it.
Comment by nfluhart — October 7, 2012 @ 6:57 pm |
I really enjoyed all all of the information. I recently bought a 350 1986 moto 4 and the clutch has since stopped working. I have taken both sides of the engine off and found nothing wrong. could you let me know where the clutch is and if you know what i need to replace it, that would be fantastic. Thanks
Comment by Greg — January 5, 2013 @ 11:08 am |
The clutches are on the right side (from the seated operator’s position.) There are two, the long one with the steel drum is the centrifugal clutch. It engages the crankshaft to the transmission at a certain RPM via the main clutch, which consists of a series of disks stacked in an aluminum basket. The centrifugal clutch is what takes the place of a hand clutch setup as is found on a motorcycle, so instead of activating the main clutch with your hand, the centrifugal clutch does it automatically at a certain RPM. It’s not really possible to inspect either clutch without removal and disassembly. It can be challenging to remove the centrifugal clutch without prior experience (although sometimes they come off easily), but it must be removed first then the main clutch second. Although it’s not exceptionally difficult, it will be challenging to do this job without prior experience. There are many things to inspect.
Comment by nfluhart — January 12, 2013 @ 6:59 pm |
to remove the centrifugal clutch is the nut left hand or right hand and also how to remove it
Comment by Rochelle Broussard — March 24, 2013 @ 10:16 am |
If I remember correctly, most Yamaha clutches are right hand thread (Most Honda’s are left). If there are a few threads sticking out past the nut, you can trace them and see the direction.
Comment by nfluhart — March 30, 2013 @ 5:44 pm
Great job on the ATV. I have the exact year and model, but am having a tough time finding used parts for mine. Particularly, I’m looking for the rear disc and worm feed screw to replace mine. Do you have any suggestions for me to try?
Thanks
Comment by ncox2012 — January 13, 2013 @ 3:52 pm |
Thanks for commenting. I checked my eBay store and unfortunately I don’t currently have a rear disc or caliper; they seem to sell fast. However, I would try looking around on eBay. I just saw a rear rotor and a complete caliper listed for reasonable prices.
Comment by nfluhart — January 13, 2013 @ 5:12 pm |
Thanks Nicolas,
I love the ATV and really would like to get it going. Would you happen to know if there are other models that have the same rear disc? I’m hoping this would allow me to expand my search on ebay.
Comment by ncox2012 — January 13, 2013 @ 5:22 pm
Per the Yamaha part number (21V-25711-01-00), the 200 and 225 Tri-Moto three wheelers used the same rear rotor. Also the 350 Big Bear up to 1995 used the same rotor. Hope that helps.
Comment by nfluhart — January 13, 2013 @ 5:33 pm
Sounds good. I’ll give those a try. Thanks for the help.
Comment by ncox2012 — January 13, 2013 @ 5:34 pm
I have an 88 moto 4 350 and one of my lower throttle cables is bad. I’m wondering if you have one lying on the shelf or if you know where I can pick up an I expensive used one? Thanks.
Comment by Brett — January 27, 2013 @ 3:59 pm |
Unfortunately, I do not have one. Your best bet for a used one would probably be eBay. Otherwise, you may be able to find a new one at cheapcycleparts.com.
Comment by nfluhart — January 27, 2013 @ 7:06 pm |
I’ve been checking eBay for awhile now but haven’t had any luck. The problem with a new one is that they run over a $100. Thanks for the help. I’ll keep looking
Comment by Brett — January 27, 2013 @ 7:21 pm
I found a throttle cable and have replaced it. Now the wheeler starts and idles fine but when I give it gas if will bog and backfire through the carb. Do you have any suggestions for me to try? Thanks
Comment by Brett — February 17, 2013 @ 11:16 am
Sounds like it’s starving for fuel. I’d clean the carburetor and check the jets. That may solve it.
Comment by nfluhart — February 17, 2013 @ 1:46 pm
Thanks for the advice. I’ll give that a try.
Comment by Brett — February 17, 2013 @ 2:00 pm
looking for the reverse shift lever assy. for a ’88 moto 4 350.
Comment by Ron — February 4, 2013 @ 9:17 pm |
Unfortunately, I don’t have one. Thanks
Comment by nfluhart — February 17, 2013 @ 1:47 pm |
I found your webpage just by accident and I love your projects so much that I have already put you on on my “Favorites”. I’m not you normal follower though. I know nothing about mechanical things. My tools are baking pans, recipes and a nice stove to cook and bake in. I’m a 66 year old grandmother and I have a husband who has Macular Degenaration and has so much trouble seeing, but, he just won’t give up on trying to renew old vehicles, 4-wheelers and such. So, now I am his eyes and try to help him as much as I can with this ole 1989 Yamaha 350 Big Bear 4×4 he is trying to bring back to life. I read your “Project” pages like a novel and I get so excited when I can recognize a part, or just a tad, know what you are talking about. I told my husband that you were a genius. Thanks for the newfound enjoyment of living through your projects. The Moto-4 project turned out awesome.
I do have a question: On our 1989 Yamaha 350 Big Bear 4×4 project, we are missing a Front Engine Motor Mount. I found one on ebay (another new quest in my life) but, it was for a 1992 Yamaha 350 Big Bear 4×4. Can we use that on our 89 model?
Thanks,
Grammy
Comment by Rita Landrum — March 1, 2013 @ 7:19 pm |
Thanks for your kind words and comments on my blog. I have a lot more cool projects to post, I just haven’t had much time…but hopefully I will soon. I think it’s awesome that you are learning about this stuff to help your husband. As for your motor mount question, just to confirm, the front engine mount consists of two triangular pieces of metal and three bolts. If that’s the mount you are looking for, the 1992 engine mount will fit your 1989 Big Bear. In fact, the same mount is used up to 1997 in both the 2×4 and 4×4 Big Bear models. Thanks again for reading and posting on my blog; I hope I’ve been able to help. Feel free to contact me any time.
-Nicholas
Comment by nfluhart — March 4, 2013 @ 11:29 am |
Thanks Nicholas for your quick response on my motor mount question. I really do enjoy spending time with my husband out in his garage. A person is never too old to learn something new.
Do you know of any “How To” video’s in detail in regards to putting a “Back Differential” back together?
This 89′ Big Bear was given to us, along with a lot of its parts in a bucket. Paul, (my husband) didn’t take this
Big Bear apart, so he isn’t quite sure how it all goes back togethter. He did buy a service manual, and it shows the parts, but shows no detail in where it all goes back. He did buy a kit with some new “O” rings and bearings, etc. Thanks once again. Rita
Comment by flgrammy42 — March 5, 2013 @ 6:18 pm |
It may be difficult to find a detailed video, but I saw this guy on youtube: http://youtu.be/ApcD1gUN7hA . He may not have the same year model, but it basically works the same way. There might be other videos on youtube as well. If I remember correctly, the bearings will each fit only in one place, so that minimizes confusion. The seals may be the same way. If your pinion bearing doesn’t have slack in it and the gear teeth look good, I wouldn’t remove it, just replace the pinion seal. If your pinion bearing needs replacing, it requires a special tool to remove and reinstall the pinion spanner nut, but I’ve done it with a drift punch and hammer. Otherwise, it should be very straight forward. Check all the gear teeth for sharpness/chips and check the splines in the ring gear (that’s the most common failure). Your manual should have detailed instructions and most of them have an exploded diagram of the parts in their proper order. If not, you can view parts diagrams for free at Yamaha’s website, as well as partzilla.com, cheapcycleparts.com, bikebandit.com, among others. Worst case scenario, if you decide to have someone else do it, a competent ATV technician can put the differential unit together in an hour or so for a reasonable price.
-Nicholas
Comment by nfluhart — March 6, 2013 @ 5:11 pm |
Nicholas, thanks for all your help. You have kept us motivated on this whole project on trying to put this 1989 Yamaha Big Bear 350 back together. We ended up putting the rear-end differential back together ourselves instead of letting a ATV Tech finish it for us. I’m glad we did, it saved us money plus, we would have missed out on all those bologna sandwiches and cold glasses of Cherry Kool-aid that my husband and I shared working in his garage. ;o)
We finished up last night, putting it all together and my husband took it out for a trial run today. He was gone for an hour. I could hear him all over these West Virginia hills around our house. He had a great time. Thanks for your time you gave us. Keep up with your projects that you are so gracious to share with your Internet Friends. I know we love seeing them.
Comment by flgrammy42 — March 24, 2013 @ 8:52 pm
Cool, glad you got it together and are up and riding. Just in time for spring. You guys have fun, and thanks for checking out my blog.
Comment by nfluhart — March 30, 2013 @ 5:46 pm
Awesome project Nicholas! I have recently bought a moto 4 350 and have a pinion that pinion bearing/seals that need replacing. I have made a tool to remove the pinion nut, but I am not sure which way it turns – Left hand thread or right? Some sources I have found say left and some say right? Hopefully my bike will look as good as yours when it is finished 🙂
Comment by David — April 12, 2016 @ 9:01 pm
Off the top of my head, I don’t remember the thread direction but if there are any threads showing you can trace them with your finger nail or a pick and determine the direction.
Comment by Nicholas Fluhart — September 20, 2017 @ 9:43 am
I’m working on my 89 Yamaha moto 4 350 that was given to me. I always had to pull crank it because the electrical wouldn’t work. I got to looking and there was no key switch so I bought one off ebay and plugged it in. Then noticed the neutral switch was broke so I replaced it. Now I bought a new battery and when I go to hook up the cables to the battery they spark and the motor tries to start. People have told me its either something is grounded wrong, the start button is sticking or it needs a new starter motor. What do you think? Need help bad
-Justin
Comment by Justin — September 12, 2013 @ 2:01 pm |
First check the hot wire from the battery and follow it. It should not go directly to the starter, it should first go to the solenoid, and then from the solenoid to the starter. If that’s correct, the problem is either your solenoid or your starter switch. Easy to test…simply unhook the small wires on the solenoid (should be two, they go to the starter switch on the handle bars) and hook your battery back up. If it still tries to start on its own, your solenoid is stuck. If not, your starter switch is stuck. Hope this helps… -Nicholas
Comment by nfluhart — September 18, 2013 @ 11:27 am |
Hey Nicholas,
I commented last year asking your advice on my 1989 Yamaha Moto 4 350. Thanks for the feedback. It really helped. I am having another problem and that is with the reverse lever. The bike was slipping out of gear when going up a hill. I tried to tighten the nut on the lever, but it broke, so now I’m trying to find another. Here is a website that shows an image of what I am talking about: http://www.motosport.com/CA/atv/oem-parts/YAMAHA/1988/YFM350ER-MOTO_4/REVERSE-LEVER
Anyway, I have gone online to ebay and see some potential parts, but they do not look the same and I don’t know what is interchangeable. Specifically I’m looking for the Reverse lever body and shaft. Everything else is ok. Any thoughts where I might find one or what interchangeable part might work (ie: something off a Big Bear???)
Thanks
Comment by pembycsi — January 3, 2014 @ 5:28 pm |
I believe the Big Bear up through 1993 had the same reverse lever. In 1994 they moved the lever down next to the engine, but the older Big Bears had the lever up on the fender like the Moto-4. Your best bet will probably be to find a used assembly from a Moto-4 or a Big Bear from eBay. Eventually, something will be listed I’m sure.
Comment by nfluhart — January 24, 2014 @ 11:13 am |
Thanks Nicholas,
Do you know the torque specs for front end (replaced bushings and spacers and castle nut) and was wondering what torque specs were for reassembly.
Comment by Jason — February 10, 2014 @ 7:24 pm |
I don’t know the exact spec off hand. I’ve done so many over the years I guess I just have a feel for it, but most torque sensitive components are listed in the service manual. Thanks
Comment by nfluhart — February 13, 2014 @ 10:21 am |
Nice blog!
I am fixing up a 1995 Moto 4 and looking for a left front mud flap. Any more NOS in your shop?
Thanks
Comment by FKelly — February 17, 2014 @ 4:49 pm |
Sorry for the delay in my response. Unfortunately, I don’t have any more NOS mud flaps. Keep an eye on eBay and something may come up. Thanks
Comment by nfluhart — June 17, 2014 @ 2:25 pm |
Hey Nicholas,
I ordered a wire control 1 for the reverse lever (the cable that runs to the switch for reverse and forward…see Reverse Lever schematic Yamaha Yfm350erw Moto-4 1989 http://www.partzilla.com/parts/search/Yamaha/ATV/1989/MOTO-4+-+YFM350ERW/REVERSE+LEVER/parts.html Part #22).
This cable has a flange that allows you to bolt it to the bike frame. The problem is that there isn’t that assembly on the frame of my bike. I’m going to try and rig something up that would allow me to bolt the flange to a part on the frame. I don’t understand why this flange is on this wire control and can’t seem to find one like the original. Any ideas?
Thanks Nicholas.
Cheers,
Nolan
Comment by pembycsi — March 26, 2014 @ 10:03 pm |
Sorry for the delay in my response. They used a few different shifter setups on these throughout the years they were made. Unless your flange mount on the frame has be broken or modified at some point, it sounds like either the schematic is in error, or perhaps you have a different year model than 1989. If you have an ’89 your tenth VIN character (from the left) should be “K”. You may try to view the schematics for a couple years before and after the one you’ve selected and see if there is a cable with the mounting like what you need.
Comment by nfluhart — June 17, 2014 @ 2:31 pm |
Hi
This is an amazing job that you did. I recently bought a moto 4 and had it running. I had to change the clutch on it as it broke. After I got it running it stopped dead ( after 100 meters) . The motor still turns over but does not start. I am going to replace the battery, and the spark plug. Have any other ideas of what might be wrong.
Thanks in Advance.
Comment by Greg — June 17, 2014 @ 11:45 am |
Thanks for your comment. There are a countless number of things that can cause one to stop running. Much like you’ve said, always start with the simple stuff first. The battery generally won’t be the problem though, unless of course it is dead. But as long as the engine turns over promptly with the electric start, the battery shouldn’t be a problem. First, see if it is getting spark. If it is not getting spark, make sure your spark plug is good and then check the stator assembly (especially the ignition pickup) and CDI as those are the two most common failures. There’s a lesser chance (but still possible) that it could be the regulator or ignition coil. If you have good spark, check the fuel. Make sure all vent hoses are clear…otherwise it can cause a problem exactly like what you have described. Next, unscrew the bowl drain on the bottom of the carburetor and see if fuel comes out. If not, trace it back toward the gas tank and see where the problem is. Also check the air intake and filter. If all of this looks good, it may be sign of a more serious problem, and unless you are familiar with more advanced diagnostics, I’d recommend taking it to an experienced technician.
Comment by nfluhart — June 17, 2014 @ 2:21 pm |
Nice project. I’m looking for a seat for a 1989 pro hauler, any ideas? Thanks in advance.
Comment by Kent — June 20, 2014 @ 3:27 pm |
The ’89 Pro Hauler uses a very unique seat and back. To my knowledge, nothing else interchanges with it. If you have the seat pan, I would have it re-foamed and covered at an auto upholstery shop. If you don’t have the pan, eBay is the only chance of finding one. Set an automated search to email you when one is listed, that way you don’t have to manually check every day…it will let you know when someone lists one. It also may be possible to build something custom for it.
Comment by nfluhart — July 18, 2014 @ 8:31 am |
I have a yfm350 moto 4, can a big bear muffler fit over on it? i am working on restoring my moto 4 and would like more tips.
Comment by James C — July 17, 2014 @ 9:36 pm |
I’ve never tried putting a Big Bear muffler on a Moto-4, but it may be possible especially if you find a muffler the same year model as your ATV. At one time Cobra made an aftermarket pipe for utility ATVs that worked on a Moto-4 also.
Comment by nfluhart — July 18, 2014 @ 8:23 am |
Nice project! I have a 1986 moto 4 225 I have no spark what so ever… I’m not getting any voltage before the spark plug coil. Any ideas. Also the off on switch is broken but I wired a simple switch could that be the issue? The engine cranks ands sounds good… Just lost on what to do next…
Comment by Dakota — July 29, 2014 @ 5:30 pm |
I’m confused. You indicate you have no spark what so ever, but the engine cranks and sounds good. If you could clarify that I may be of more help.
Comment by nfluhart — August 28, 2014 @ 11:39 am |
Nice Job on the project.
I just bought the same quad can you tell me were the fuel filter ,oil filters are located also how do you switch it into low?
Thanks Scott
Comment by Scott — August 26, 2014 @ 4:35 pm |
Thanks for the comment. It doesn’t have a serviceable fuel filter unless someone has put an in-line filter on the fuel line going from the gas valve to the carburetor. It has a small pickup stainer inside the tank, it mounts to the gas valve. No need to pull the valve to check the strainer unless you are having fuel problems. To find the oil filter, follow the oil lines from the cooler to where they go into the engine. There is a round housing there, the oil filter is inside. Be certain not to put the new oil filter in backward, it will burn up the top end of the engine quickly. The lever on the left side (either on the front fender or down on the engine depending on the model) has three positions, usually. All the way forward is high, middle is low, and back is reverse. You will see a noticeable difference from high to low.
Comment by nfluhart — August 28, 2014 @ 11:36 am |
good job on the moto4 i have a 1988 terrapro do you know if any other carbs will work with it i cant find a new of used one anywhere
Comment by tayler pelham — November 8, 2014 @ 9:09 pm |
Most of the old 350 Big Bear, Warrior, Moto-4, and some of the early 400 Kodiak carburetors can be made to work fairly easily. It may require changing the jets, throttle cable, and intake boot, but it can be done. I used a 350 Warrior carburetor on my Moto-4 and used the Warrior throttle cable instead of the old dual cable setup that was on the Moto-4, and it worked great. I used the Moto-4 choke cable because the Warrior uses a hand operated plunger down on the carburetor…I just threaded in the cable operated Moto-4 plunger in place of the Warrior hand operated plunger.
Comment by nfluhart — November 10, 2014 @ 1:59 pm |
Do you have or know of a tutorial video on how to remove the carburetor (more specifically the throttle cable) on a 1989 moto4 YFM 200 DXW?
The atv has been sitting idle for 5 years (running fine when stored away) and want to clean the carburetor before starting it up again. Any help would be appreciated.
Comment by Joe — February 7, 2015 @ 9:45 pm |
Short of a youtube search, I don’t know where you might find a video, but it’s a fairly easy procedure. However, properly cleaning and tuning the carburetor is a much more advanced task than removing the cable. I believe on that model, the cable enters the carburetor through the top. Unscrew the top cap (there is a large spring behind it, so do this carefully) and the entire slide assembly pulls out. Once out, you should see how the throttle cable unhooks from the actual slide. When the slide and spring are removed, simply unscrew the cable housing from the cap. Install in reverse order and be sure to align the slide with the notch down in the carburetor and test the throttle before restarting the engine.
Comment by nfluhart — March 30, 2015 @ 9:39 am |
I have a 1995 moto 4 that we have try a starter on it and a icd box and pick up col on it when you try to give it gas it pops out the mofler lond that it clrs right up then you lat it idl it backs fars out the mofler and runs bab but when it clers up its ok what can I try or what wall fix it
Comment by brenda — February 18, 2015 @ 12:28 pm |
Could be any number of things, electrical, fuel, valves, etc. If you are confident the electrical system is good, the next likely suspect is the fuel system. My best recommendation is to take it to an experienced technical. In the long run you’ll save a lot of time and money.
Comment by nfluhart — March 30, 2015 @ 9:33 am |
Disculpe el armado del motor y la sincronisacion de la cadena de tiempos como se ensambla o cuales son los puntos para sincronizar la cadena de tiempos???
Sorry the engine assembly and chain sincronisacion times as assembled or which are the points to synchronize the timing chain ???
Comment by Alvaro Martin Carrillo Bueno — March 29, 2015 @ 8:44 pm |
You need the piston to be at top dead center (TDC) and the index mark on the top cam sprocket to be pointing straight up.
Comment by nfluhart — March 30, 2015 @ 9:29 am |
Hey, I have a 1987 moto 4 350, and it runs great…until I attach a battery. Then the spark is gone. As soon as I disconnect it, it runs again. Any ideas? Any help would be appreciated.
Thanks.
Comment by Cody — March 30, 2015 @ 3:16 pm |
Have you tested the voltage rectifier/regulator? Also, is the battery new? If so, is it possible it was charged backward, reversing the polarity?
Comment by nfluhart — April 7, 2015 @ 5:02 pm |
Hey, I have an 87 warrior and am currently rebuilding the carb. I noticed the accelerator pump is stuck in the down position (probably from the years it has sat). I believe the accelerator pump (rod and spring) should just slide out and that nothing is holding it it and it does not have threads.
Any suggestions on how to get the accelerator pump out so I can replace it?
Note: The accelerator pump rod that allows shots of gas appears to have been broken off, so could be fun trying to get it out when it is stuck down in there.
Comment by Trent — May 13, 2015 @ 1:04 pm |
Aside from something creative, penetrating oil and compressed air would certainly help. Good luck with your project.
Comment by nfluhart — October 26, 2015 @ 9:11 am |
I have a 1989 MOTO 4 and I cant find right front CV half shaft /axle.Is there any other models that will fit this. Thanks for your HELP
Comment by Allen Stout — July 9, 2015 @ 5:35 pm |
Hello. Since there was never a 4×4 Moto-4, what you must have is a 1989 350 Big Bear (it may say “Moto-4” on the rear mud flaps, but if it’s four wheel drive it’s actually a Big Bear). Take a look on eBay, you should find something there.
Comment by nfluhart — July 9, 2015 @ 5:57 pm |
Hi, I just got an old moto4 from a friend, It runs good but the rear is leakin gear oil. I ordered all the bearings and seals for the front wheels and rear differential. My question is. Is this bearing and seal repair to the rear very difficult? I can’t seem to get any information on this repair.
Comment by Ron Spanevello — September 3, 2015 @ 10:18 am |
The rear end repair requires moderate to advanced mechanical experience, especially if you want to replace the pinion bearings and seal. The Moto-4 rear end is very similar to a Big Bear 350, Kodiak 400, etc. You should be able to find a youtube video on the process. That will be very helpful in determining whether you want to tackle the project. I say go for it. Worse case, you could remove the rear differential yourself and take the chunk to a local shop and have them press in all the new bearings and seals.
Comment by nfluhart — October 26, 2015 @ 9:00 am |
HI Allen!
I recently was “gifted” with an 88 moto4 350 very similar to the one you have posted here. Great job btw! Unfortunately someone had “worked” on this one and supposedly overhauled the carb then let it set for at least a year in the weather with gas in it. (Mind you this was a gift for taking in a hunting dog for adoption that ended up being gun shy so the owner had no use for her. I’m not complaining! She’s a great dog and needed a place to run and a family who cared less if she was gun shy so I’m miles ahead! lol)
Anyway, I drained the carb, (green gas. not a good sign) And proceeded to remove the rear boot so I could spray out the carb as best I could. Rinsed the tank and cleaned the petcock. Hooked it all back up. Put some gas in and hoped.
Of course you guessed it. No luck.
Starter turns fine. Good compression. I have spark. Removed the air filter and hit it with stating fluid and the engine roared to life…and of course promptly died.
I suspect a cab rebuild at least and of course the intake boot is broken so it has to go. Whoever “worked” on it removed the fresh air intake boot from the air box and the tank bottom bolt that holds it to the frame. I found several screws and bolts missing from the moto 4. Otherwise from what I can tell it will fire and run. The elect seems good. Obviously no idea on the tranny, ect. The former owner said it was his father’s (70 yo man) and had only about 500 hrs on it.
Long story short, I have no area to work on it and I travel so my time is hard to allocate but I’d love to get this going. Yamaha won’t work on it.
I would be interested in seeing if you might consider going through it for me? I’m in NW Arkansas but I travel all over and could likely deliver it to your shop easily.
Comment by shaun c. — September 13, 2015 @ 12:11 pm |
Sorry Nick! I was reading the post above mine and had “Allen” on the brain!
Comment by shaun c. — September 13, 2015 @ 12:58 pm |
Sorry for the delay and thanks for the inquiry, Shaun. I wish I had the time to work on ATVs and such. However, most of my time is taken up with running three full-time business endeavors, and subsequently most of my own ATVs and trucks are in disrepair. The good news is that it sounds like your problem is limited to the carburetor. Make sure your intake boot isn’t cracked and you are getting fuel to the carb. If that checks out, remove the carb for a thorough cleaning. Make sure the two jets aren’t stopped up, and spray carb cleaner then compressed air through all the ports, etc. Check the needle valve and polish the seat. That’s about it. A repair manual might be helpful. If you don’t want to tackle it, I wouldn’t mess with a dealer. Take it to a reputable independent shop…I would think the bill should be around $150. That should cover a repair kit (if it’s needed) and an hour or two labor. You can bring it by my shop if you want, but it could be months before I’d have time to get to it.
-Nicholas
Comment by nfluhart — October 26, 2015 @ 8:54 am
I have a 1989 bigbear that needs left & right cv axels. Does someone know what years are interchangeable?
Comment by Jeff — October 24, 2015 @ 7:46 pm |
Were can I get a CDI unit for the Terrapro??
Comment by Mark — December 2, 2015 @ 6:27 pm |
I need to ask…. where did you get your rebuild kit ?? I’m having one hell of a time finding one that isn’t coming directly from the dealer… and they are extremely expensive !! I commend you on what you did for that machine ! Very very awesome ! I have a 1987 Moto4 350 … and LOVE IT !!
Comment by Darin Pratt — April 11, 2016 @ 4:49 am |
Thanks for the comment. I got the carb kit on eBay. They’re about $20.
Comment by nfluhart — April 11, 2016 @ 8:47 am |
Look I’m a 73 year old so I’ve had my share of 3 and 4 wheelers . Most taught me both a reliability and financial lesson. Your style and information is the type I would like to find in a shop when I have a problem. I recently purchased a Moto 4 that I think is a 88 or 89 ? This thing is in excellent condition. I have no idea how to send you a photo lol Hey ! I’m old school and old .
I’m looking for some floor boards to keep limbs and such from ripping my foot off.
I think this model needs two for this model? Any ideas or suggestions?
You have the most common sense knowledge of any of these things compared to other
Blah Blah Blah …I think the Moto 4 was one of the best ones made !
Thanks Chuck
Comment by Charles Pruitt — October 22, 2016 @ 9:08 am |
Chuck, a few comments have slipped by me so I’m trying to get caught up. Yamaha made an OEM floorboard as an accessory, but it’s basically just a heel guard. You can still find these on eBay from time to time. Most of the full floor boards I have seen were either homemade by a welder, or an aftermarket accessory that is undoubtedly discontinued by now.
Comment by Nicholas Fluhart — September 20, 2017 @ 9:48 am |
dose anyone know how you disconnect the throttle cable on the carb on the 1987 350 moto 4 any help would be great please help and thank you
Comment by Dan kinney — March 28, 2017 @ 10:07 am |
Take the black plastic cover off the left side of the carburetor and turn the throttle shaft wheel until there is slack in the cable then unhook the cable end from the wheel (there is a brass end piece to keep up with). Then unthread the cable housing from the carburetor body.
Comment by Nicholas Fluhart — September 20, 2017 @ 3:27 pm |
Hi Nick
Great job on the old Moto 4. I have one year 1987 with broken centrifugal clutch springs and jaw shaft bolts.
I found an engine from big bear350 but year 1991. Instead of changing the clutch I swaped the engines, they bolt right on. I got no spark after changing the engines. I was trying to trouble shoot the problem and so far I found out that the magneto on the big bear engine has a longer lope in comparing to short one on original engine from moto 4 . Do you think I have to change the magneto and stator from moto 4 to newly installed big bear engine? Or should I get a big bear chi box and try to wire in existing moto 4 harness?
Comment by Radek Oksimowicz — August 20, 2017 @ 9:49 pm |
If the electronics on the Moto-4 engine are good, I’d probably switch them and the flywheel over to the Big Bear engine so you don’t have to buy a CDI unit.
Comment by Nicholas Fluhart — September 20, 2017 @ 3:30 pm |
Hi
I am working on a Moto 4 350 1987 with broken centrifugal clutch. I found an engine in good running condition of of the big bear 1991. Looks the same as the moto 4 engine so I decided to swap the engines instead rebuilding broken clutch. I bolted the big bear engine on and tried to started but without any luck . I checked for the spark – no spark.
I opened the case cover and looked at the magneto and the stator and I compared with the moto4 .
Looks like the magneto from moto 4 has a shorter lope on it in comparison to big bear one. Would that be a problem that I don’t have the spark? Just to clarify, am using the same original CDI from moto4 engine.
Do yo think my problem is in CDI ? Should I find big bear 1991 CDI and put it in? Also, the plugs are different.
Thank you for your help.
Comment by Radek Oksimowicz — August 25, 2017 @ 8:34 pm |
Yeah, like I said above I think I would put the Moto-4 electronics on the Big Bear (flywheel included, which will take a special tool to remove). This way you don’t have to disturb the factory wiring on your machine and you don’t have the expense of buying a Big Bear CDI unit.
Comment by Nicholas Fluhart — September 20, 2017 @ 3:33 pm |
Hi … I currently have a 1988 Moto4 350
and I’m in love with it and will probably never sell it ! But what I am not too thrilled with is the power brake system… question….
Do you think I can convert it to hydrolic
from like a Big Bear or Warrior of around same year as mine ?? Also
what about converting it to a single throttle cable instead of that ridiculous
dual cable set up ? Would Warrior be a good way to go for that change over ?
Thanks for your input … it’s greatly appreciated !
Comment by Darin Pratt — September 20, 2017 @ 5:00 pm |
I’m not sure about a brake conversion, but it sounds doable. The Big Bears, both 2WD and 4WD use hydraulic drum brakes on the front. The Warrior uses disc. If the knuckles will bolt up, you got it made. I used to have enough of that stuff laying around to check, but I don’t have much of that older stuff anymore. As for converting to a single throttle cable, the later models 350 Moto-4 and Big Bear, Warrior, and even the early 400 Kodiak are models that you can make work. Get the carburetor and throttle cable (and maybe the intake boot depending on the model) from one of those and maybe do some tuning with the jets. I think I used a 350 Warrior carburetor on mine. It worked great.
Comment by Nicholas Fluhart — September 21, 2017 @ 12:55 pm |
Hey Nicholas. Really enjoyed your posts. And appreciate your willingness to help everyone out. Hopefully you can help. This might be lengthy, but I have found too much infor is often better then too little. That being said, I will begin. I picked up an 89 moto4 250 for really cheap. Doesn’t run. Was told by the person I got it from that he just got it with another atv and didn’t know much about it other then it used to run but no longer had a carb on it. So, I got it home and took all the plastic and racks off to get a better look. Found it need a battery, starter relay, throttle cable and other cables etc. Not a big deal. without it running it seemed to shift it all gears, foot shifter and hi low, reverse hand shifter seemed to work. So, I replaced the carb. Wanted to change the oil before attempting to start it. When I drained the oil a few pieces of what looks lik a broken spring about the diameter of a pencil fell out into the drain pan. reaching up in there with my finger i found 2 more small pieces. They don’t look chewed up or anything just broken pieces. and now the hand shifter doesnt seen to go into reverse. Any idea what these pieces might be from? I was moving the hand shifter through hi, lo, and reverse with the foot shifter in nutruel. Now have read that the foot shifter must be in 1st gear to put the hand shifter in reverse. Did I break something?? Any help would be much appreciated. I will wait to hear from you before I start tearing it apart. Thank you. Jim
Comment by James Lee — December 17, 2017 @ 4:16 pm |
Sorry, this is really late so it may no longer be relevant. Have you tried operating it yet? There are number of small spring in the engine (shifter return spring, centrifugal clutch spings, balance shaft damper springs in the balance shaft gear). I’m not aware of the a spring in the hi/low/reverse sub-transmission, but I could be wrong. It’s been to my experience with Moto-4’s that the centrifugal clutch springs fatigue and break. This would result in constant engagement of the transmission (like a manual clutch) and the engine stalls when the ATV is not rolling.
Comment by Nicholas Fluhart — May 17, 2018 @ 11:30 am |
Great info in the article and excellent work on the comments! I read through them all to see if anyone was exspereancing similar problems. I have a 86 moto 4 yfm225s. Purchased it and used it a ton last year. Then i started having issues with the hi-low-reverse. The wheeler operates in low but will slip occasionally. Hi range and Reverse slip and the wheeler will not move. I have removed the covers on both the right and left sides to inspect the gears and clutches. Visually they all seem fine. Question being could this issue be caused by the clutches? Is there a way to diagnose if the clutches are good or bad. Would you suggest a path forward? Additional info to take into account. Issues started when another rider attempted to shift the hi-low- reverse in neutral without the break and the handle to shift the range broke off. The individual then drove out of the woods in low range as it was the only one that worked. when i pulled the covers there were some fine mental shavings in the bottom of the case, guessing this was from ware and tare as there were no larger particulars to suggest the machine lost a gear. Any information helps, im looking for anything i can test or replace. Possible issues etc. this is the first 4 wheeler i have tore into so im new to small engines. Thanks for all of your information above!
Comment by Gus — February 25, 2018 @ 12:19 pm |
“Slipping” itself is not a gear issue, it is a clutch issue. Gears can disengage and the engine will feel like it’s totally in neutral, but they don’t slip. So once you determine which the issue is you can go forward with diagnostics. If it’s slipping, pull the clutches. Inspect the shoes and drum of the centrifugal clutch and inspect the plates of the main clutch. Clutches can burn and glaze when using inappropriate gears (i.e. starting off in any high gear from a dead stop, or pulling loads in high gears at slow speeds, etc. etc.). If it’s not slipping but the gears are disengaging, start by inspecting the gears in the sub transmission which you can do without splitting the cases, and check any shift components for bends (i.e. shift forks/shafts). Check the engagement “dogs” on the back of the gears where applicable. They need to be sharp and square…if they are rounded off the gear will not stay engaged. To get into the main transmission, you’ll need to pull the motor, remove the top end and split the crank cases.
Comment by Nicholas Fluhart — May 17, 2018 @ 11:23 am |
Great video Nicholas. I have 1988 yamaha moto 4 350(yfm350eru). what is the secret in disconnecting the choke cable. I have backed the nut off but cable will not extract from carb. The two yamaha dealerships in town have been no help. Thanks for any input
Comment by Kenneth — November 29, 2018 @ 7:22 am |
The end of the choke cable is connected to a plunger in the carburetor that is supposed to pull out when you back the nut off. They tend to get stuck if the carb is really dirty or hasn’t been used in a long period of time. Soak it in penetrating oil. That’s the only chance you have of getting it out without damaging the plunger assembly. Worst case, you can pull the cable to the side and use a small flat screwdriver to bend the ears where the cable connects to the plunger and remove the cable, but they will likely break off. Then you’ll have to find a way to twist the plunger back and forth (with a screw driver or drill bit) until it comes out and you can replace the plunger assembly, but if it is stuck bad enough you may have to drill it out. Sometimes they never come out and you scrap the carb, but it would have to be very dirty for that to happen. Good luck.
Comment by Nicholas Fluhart — November 29, 2018 @ 8:00 am |
Nicholas, I found a used starter set for 1987 yamaha moto4 350(YFM350ER).I have 1988 MOTO4(YFM350ERU). It appears they would interchange. What do you think. REF# 48, I am soaking the plunger with carb cleaner since last night, have not been able to extract yet. Thanks for your feed back I at least know what the plunger looks like inside the carb.
Comment by Kenneth — November 30, 2018 @ 8:54 am |
Last night I finally got plunger out of card(1988 yamaha moto 4 350). The pilot jet screw has a hole in screw but does not go all the way thru. The end is solid brass.I thought there would be a hole all the way thru like with main jet?????
Comment by Kenneth — December 4, 2018 @ 5:42 am |
There are a few variations of the 350 carb, and I think some have a blank plug that looks like a jet, but if it is the actual pilot jet it should have an elongated section that is perforated and it should have a hole through it like the main jet but very very small. When it is stopped up, it may look solid. I use a torch tip cleaner (careful not to ream it out) and compressed air with spray carb cleaner. Should be able to hold it up and see daylight through it.
Comment by Nicholas Fluhart — December 5, 2018 @ 11:17 am |
I had an 88 Moto4 growing up and regret selling it. Well, today I finally found one that appears to need minor work for now that I can tell. Do you know of good online resources for Moto4? I have found a few forums, but nothing yet that still seems to be active or that has resources such as manuals. They said it was a 2000 Moto4, but I didn’t think that they were made that late but I could be wrong. The chassis # is jy459v00500012353
Comment by Jeremy S Atchley — June 18, 2021 @ 10:45 pm |
I don’t recognize that VIN, and they didn’t make a Moto-4 in 2000. The 10th VIN character would be “Y” for a 2000 model. Whatever the case, you may just have to check google and youtube for info. Manuals and parts can be purchased on eBay. There may also be Facebook groups.
Comment by Nicholas Fluhart — April 3, 2022 @ 2:46 pm |
Please help!!! Is there a way to get the fuel tank off without taking the front fender loose? Also tips with getting the carb off. Thanks
Comment by Heather Heath — January 2, 2022 @ 11:30 am |
I think you can slide the tank out without loosening the fenders, but it is very difficult. To remove the carb, unhook the fuel line, loosen the carb from the manifold and air box tube. This will allow you to rotate it…making it easier to unhook the choke and throttle cables.
Comment by Nicholas Fluhart — January 3, 2022 @ 12:15 pm |
I did that so probably just need to use a bit more force. I didn’t know taking off the manifold would help or not. Since it’s going to be difficult taking the gas tank off with the fenders on any suggestions on how to clean it out while attached. It’s been sitting and there is nasty stuff coming out. Thanks again
Comment by Heather Heath — January 4, 2022 @ 4:31 pm